You may want to use this feature when on the road, you receive a call from a customer and need to create a work order in the system which then your manager can see through their portal.
Note: to use this feature within the driver application your Manager must enable the feature for you. Use the "Getting Started" guide for help with other features.

Step 1
Once in the driver app, select the “Job” icon which is the third option from the left on the bottom of the screen. On this screen, on the top right-hand corner press the cross to create a job.
Step 2
Begin adding job information such as Customer Name, Delivery address, Customer phone number and Delivery time. Optional information includes the customers email address as well as Unit / Suit / Apartment number if required.

Step 3
When you select what address the delivery is being made out to, you will be taken to another page where Google will validate and populate the desired address based on either your current location or what ever address you type into the search bar. Once the “Add to Job” button turns green you can now save the address for delivery.

Step 4
To enter a delivery time select the “Delivery Time” box and then proceed to add the specified time. An optional extra is to add a “Deliver After” time and a “Deliver Before” time therefore creating a window in which the delivery it to be made.
Note: Android application will look like this (What image upload service to use?).

Step 5
After you have entered all of the desired information, select “Save” to continue through the job creation process.

Step 6
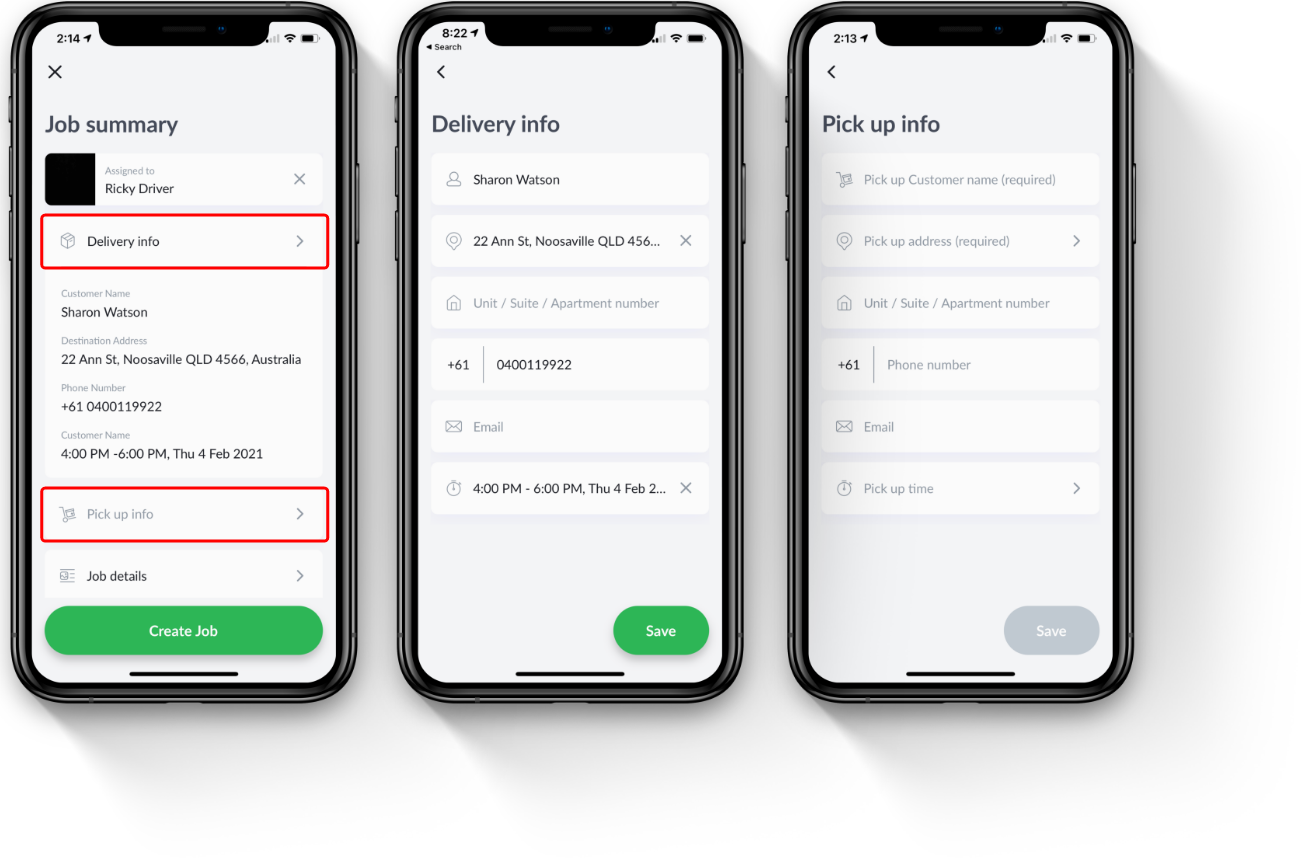
Now you are on the “Job Summary” screen, you are able to assign the job directly to a driver (default selection being yourself). If you do not want the job assigned to you, press the “X” next to your name.

Step 7
Selecting “Delivery Info” will bring up another screen where you can do final edits to the Customer Name, Address, Phone number and Delivery times. As an additional step, selecting “Pick up info” you can choose an address from a Hub or manually enter an address which will also be validated by Google. “Pick up” is used for jobs which require the driver to stop at another location before navigating to the end customer, for example picking up stock at an offsite warehouse. Learn more about “Pick up” here.
Step 8
Selecting “Job Details” will allow you to enter more information such as Job Name, add in Comments, scan in Barcodes, and Skill Sets and Labels to the delivery. Click “Save” once you have entered the desired information.

Step 9
After entering in all of the necessary information for that delivery, select “Create Job” to save and create the delivery.
