Pre-Inspections allow you to manage the risk associated with working onsite by capturing any site details prior to beginning work, such as any site imperfections (e.g. broken floor tiles, error codes on appliances) or detailing the issue which requires attention prior to beginning repairs.
Step 1
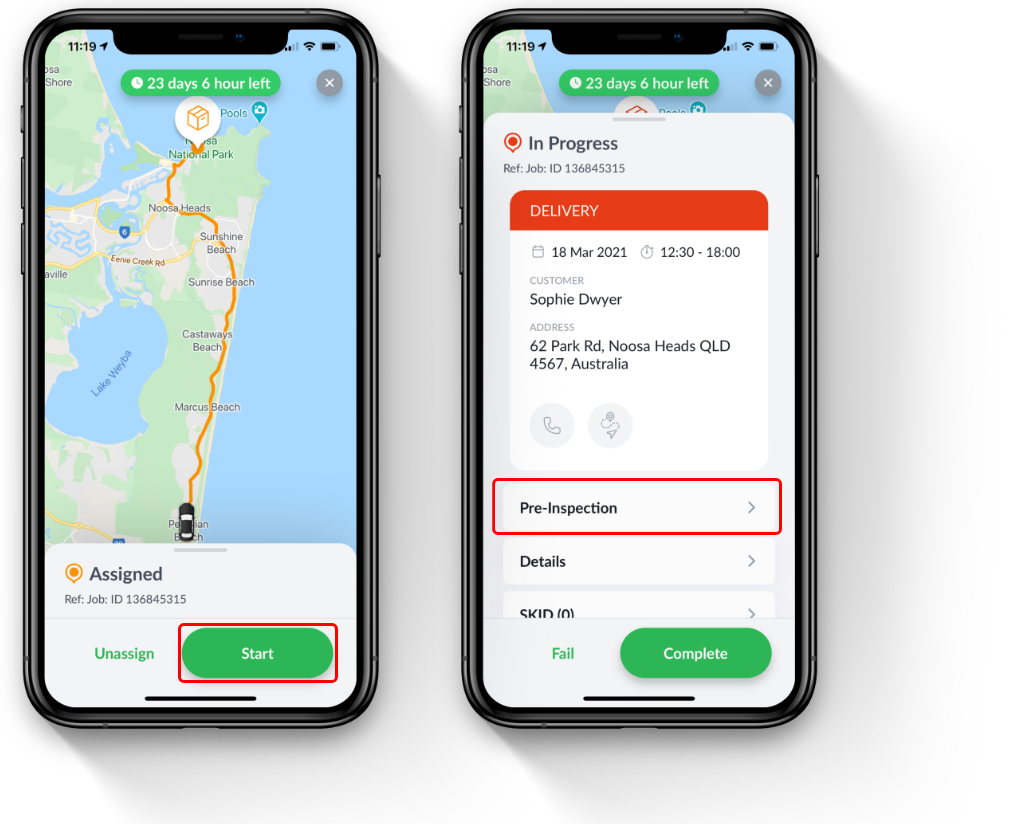
When you have arrived on-site and have identified any issues to document by conducting a site inspection, tap the 'Pre-Inspection' button.
Step 3
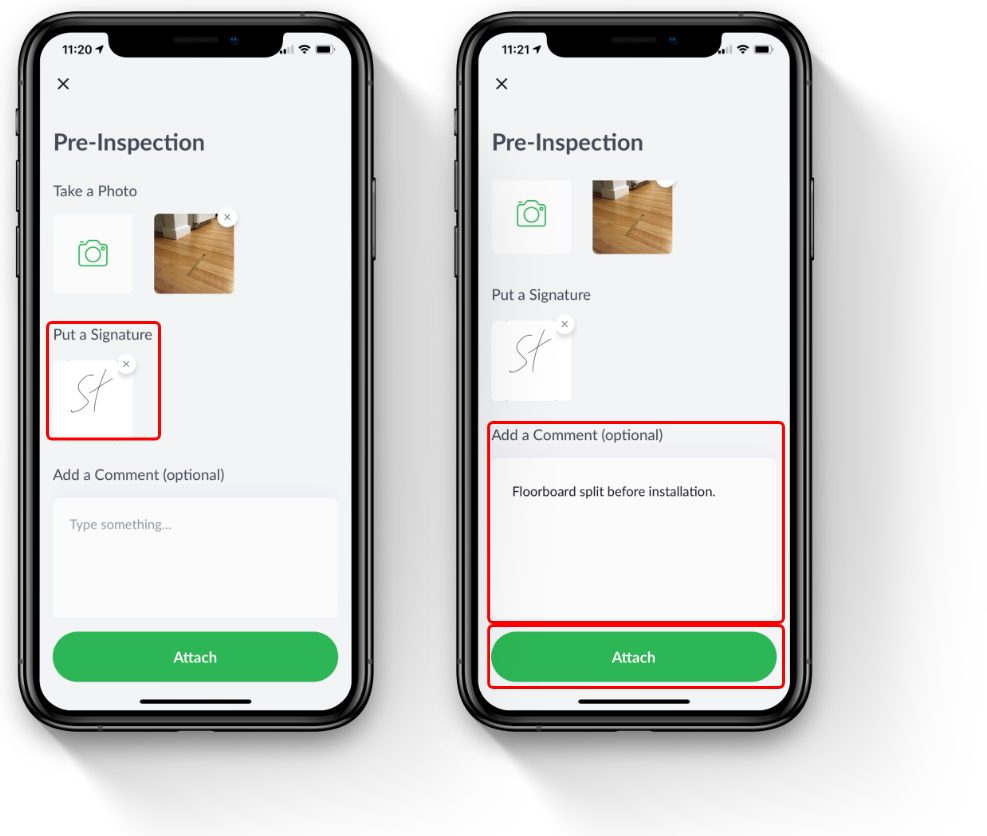
To document your Pre-inspection, Radaro allows you to add high-res images, attach a signature using the 'sign on glass' feature and add any additional comments.
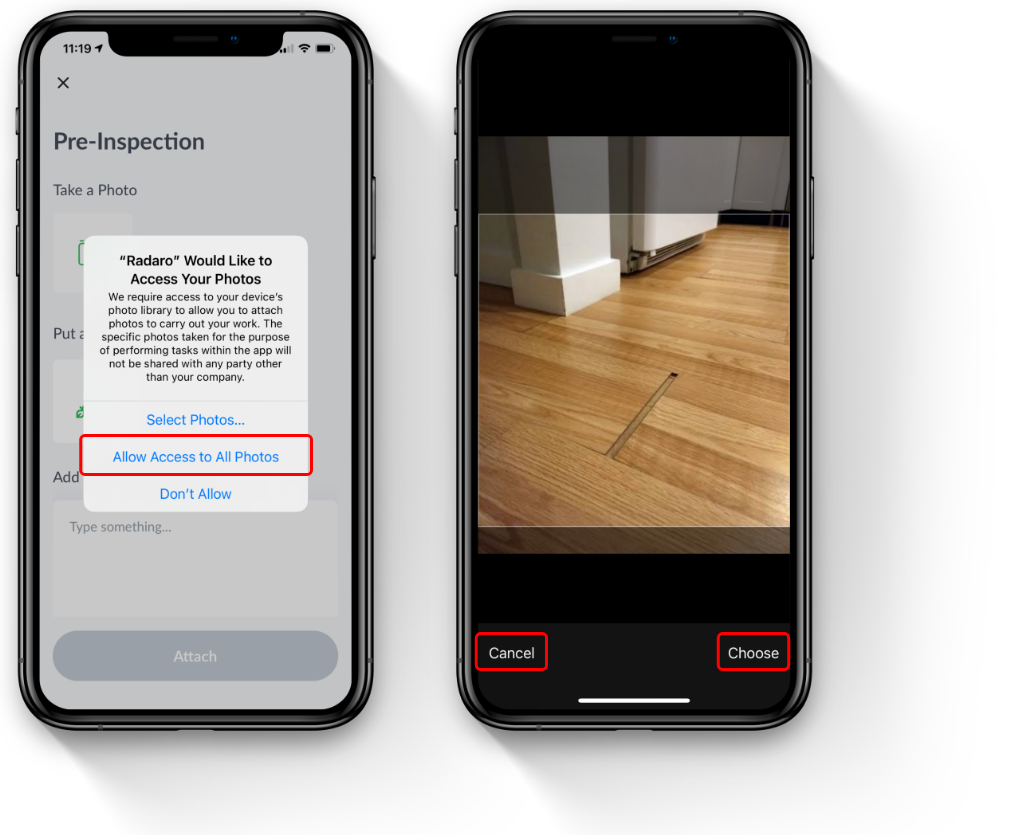
To take a photo or choose an image from your phones gallery (up to 30 photos can be added), select "Take a Photo" and then choose which option you would like to use.

Step 4
To choose an image from your phone's gallery you must allow Radaro access. After allowing access, select the image or images you would like to attach to the job, then either press cancel to select a different image or select "Choose" to attach the image.
Step 5
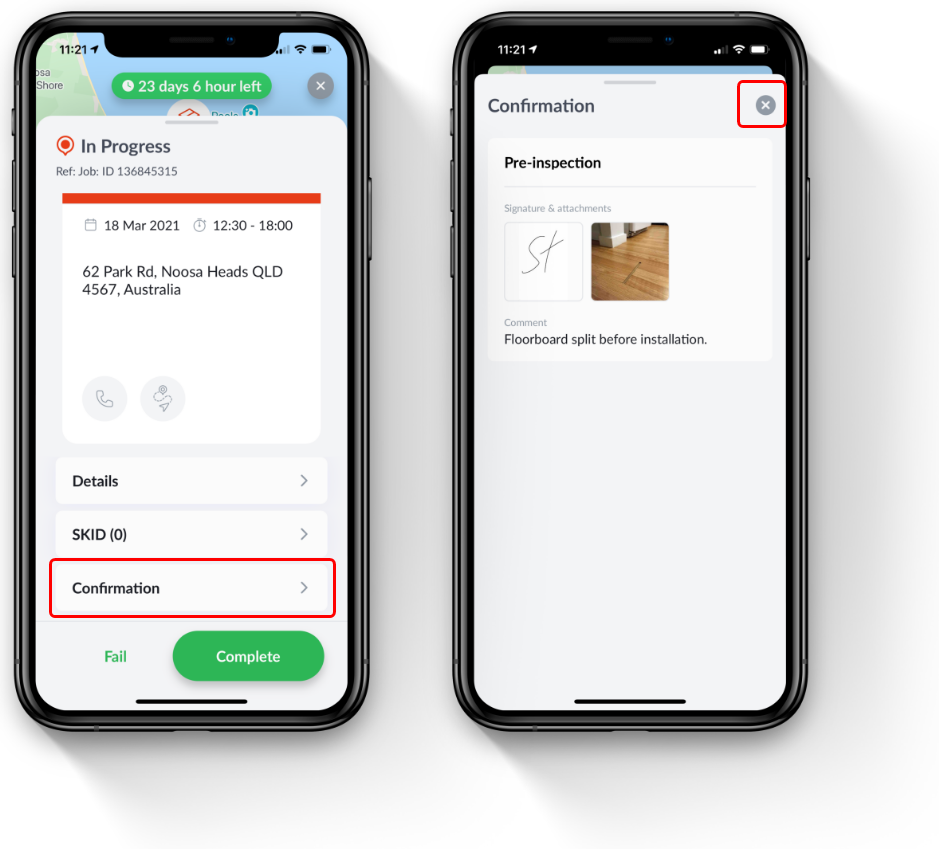
Once you have attached any relevant images, additionally, the sign on glass feature allows for the capture of the customers signature to confirm the pre-inspection and add any additional comments which will help with detailing the inspection. After this is complete tap "Attach" to attach the documentation to the job.
You’ll then be returned to the main job screen where you can continue with the completion of the job.