Once you have Started your Shift and completed the Start of Day Checklist (if required) you are ready to start your jobs for the day.
Step 1 - Viewing the days jobs
From the home screen, swipe up on the "Today" to see the jobs list. This view provides a list of the jobs in the order they should be completed.
Tapping on "Yesterday" or "Tomorrow" we can see any previously completed, or future jobs depending on if your manager has assigned any jobs to you.

Step 2: Viewing Job Details
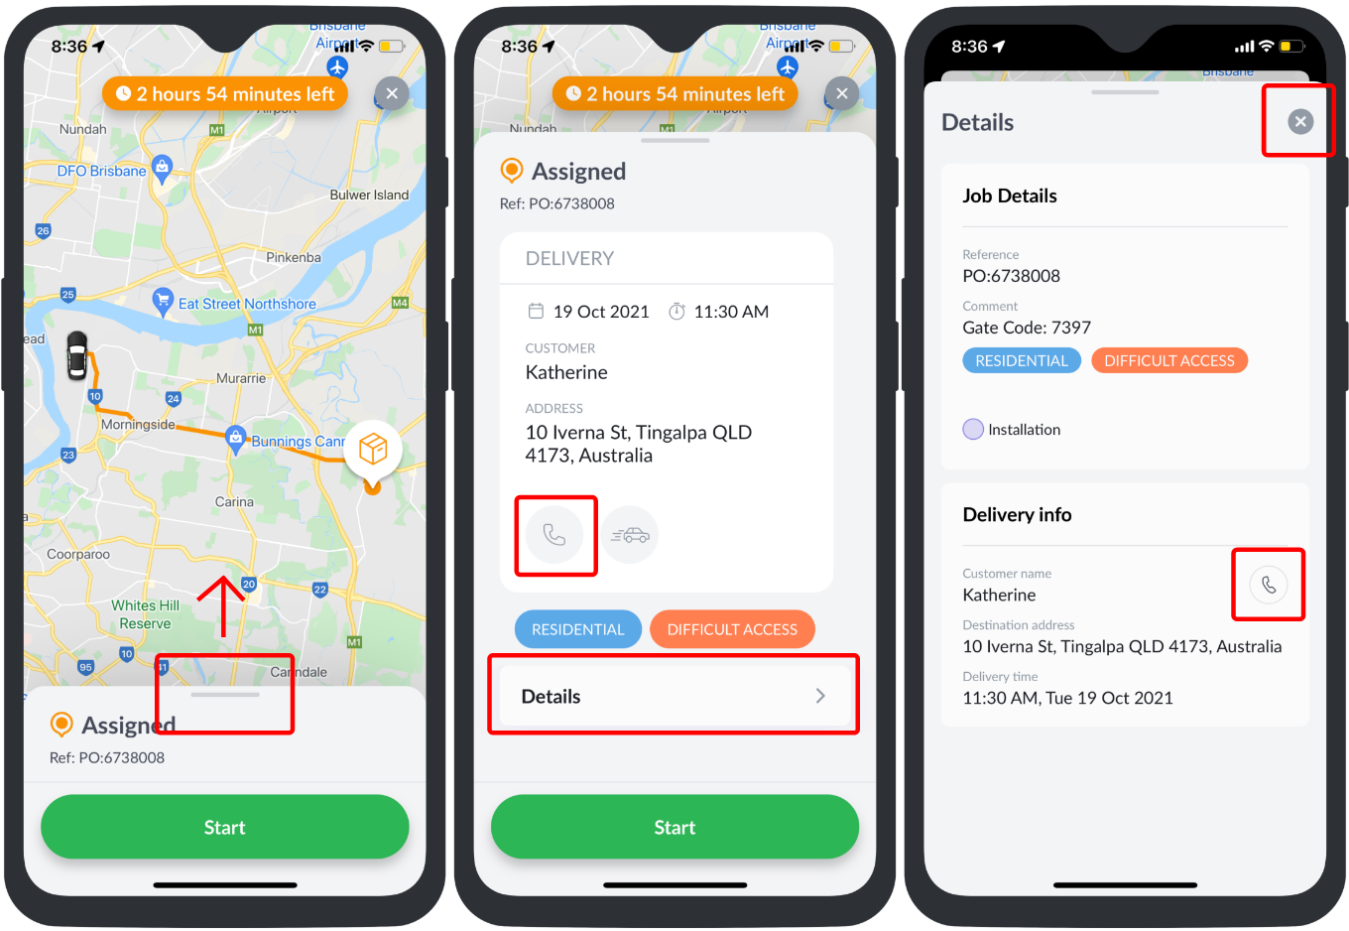
Select the first job, you will see a quick overview of the details. You will see the job deadline date and time, the customers name and address as well as a "click-to-call" button to call the customer.
Selecting "Details" will move you to another screen which will include further information about the job which your manager has entered including any labels or skill sets required to complete the job.
Step 3: Navigating to the customers address
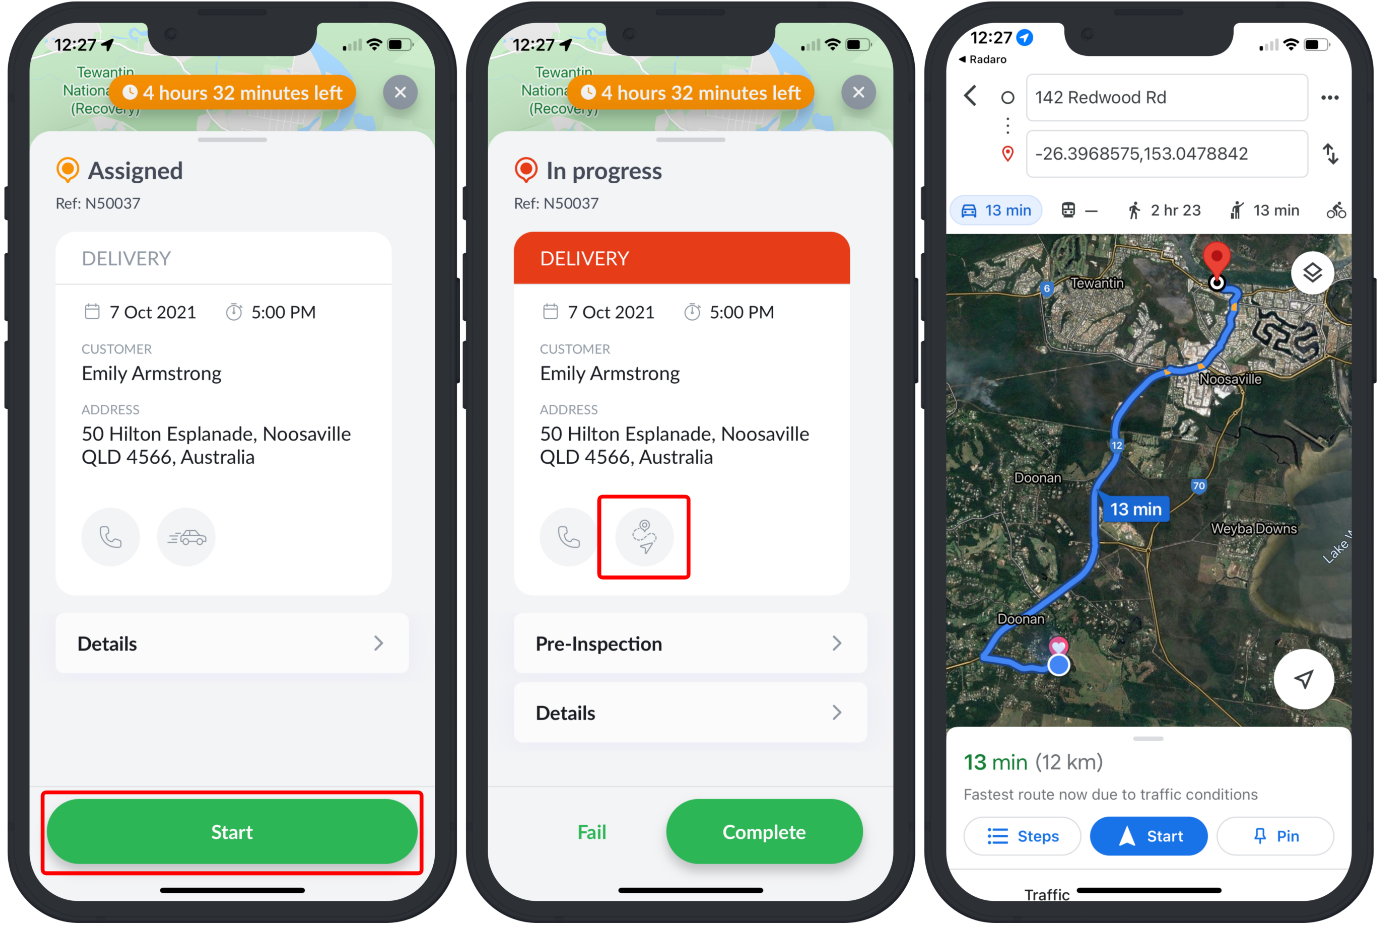
Once you have read through the details of the job and are prepared to begin the job, select "Start" and the status will change to an "In Progress" status. Once the job has been started, we can push out to the preferred navigation app.
Step 4: Completing a Job
Assuming you have arrived at the customers address, we now move through the "Job Completion" steps.
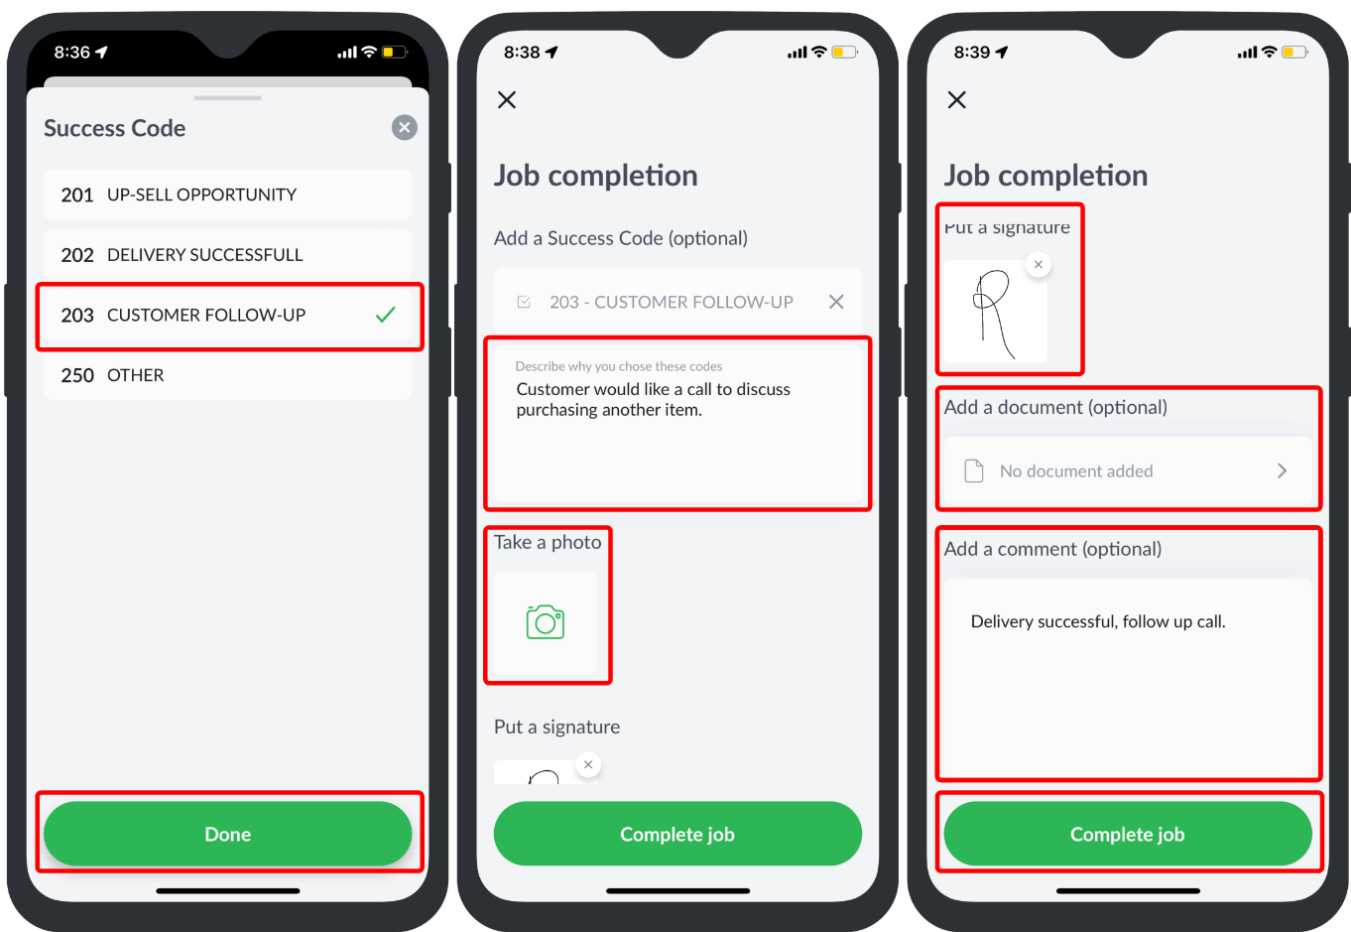
Step 4.1 - Successful job completion
- Select a "Success Code" (which are defined by your manager) and add any further comments about the job and the reason you selected that code.
- Capture an image, this might be the customer letterbox to prove that you were at the correct address, or this might be an image of the installed appliance. (A minimum number of photos may be required to complete the job. Plus a maximum of 30 photos can be added)
- Capture a signature
- Scan in any additional documents (optional feature)
- Add in any final comments you wish to attach to this job
Step 4.2 - Unsuccessful / Failed Job
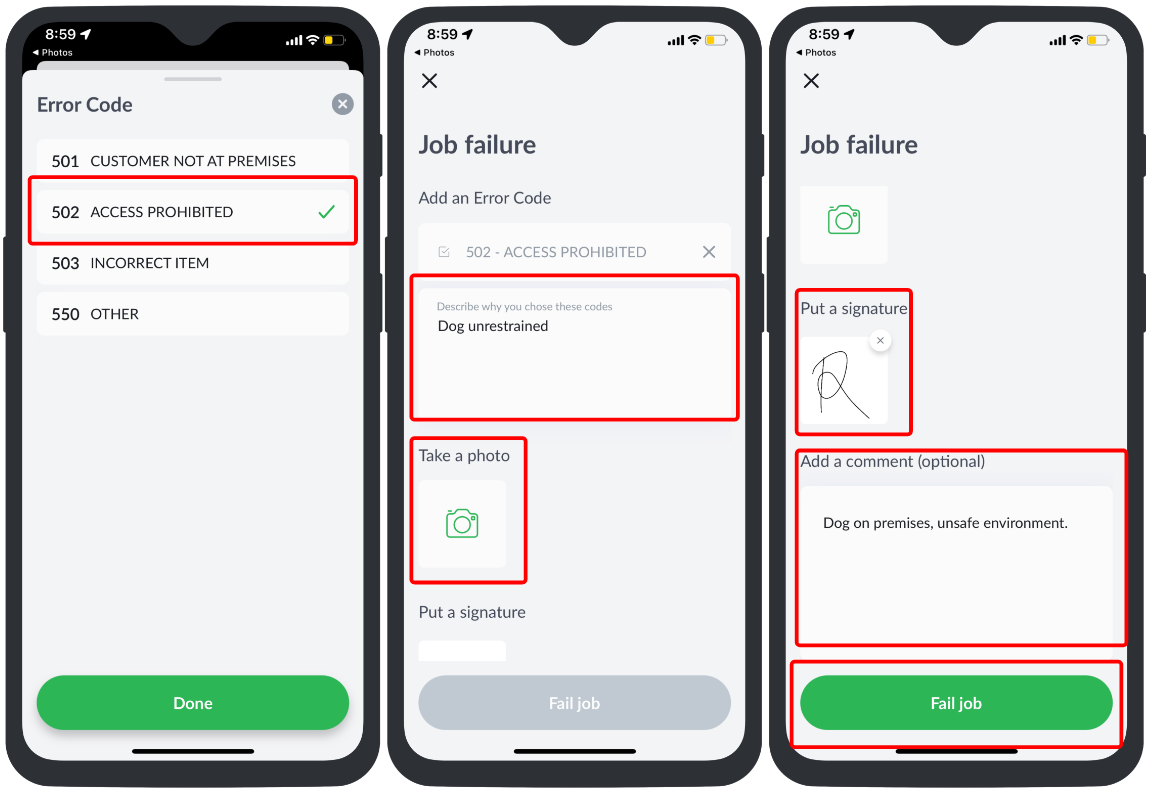
If for any reason, you are unable to complete the job, you can "Fail" the job.

When we "Fail" the job, we are presented with a similar screen to when we are to "Complete" a job though we get to select an "Error" code set up by your manager.
- Select the required "Error Code"
- Add a description as to why the job was failed
- Add in an image which demonstrates why you could not complete the job
- Enter in any final comments
Once you select "Complete Job" the job will move to a "Finished" status in grey and will remain at the bottom of your "Today" jobs list. You are still able to select the job and see what information was previously entered, though cannot be edited.