STEP 1 - ENABLE THE DEVELOPER TAB IN EXCEL
If you do not see the Developer Tab in the Toolbar Ribbon, you will need to enable it first.
1. Open an empty Excel workbook. Right-click on an empty space in the ribbon and select "Customize the Ribbon"

Fig: 1.1
2. In the Excel Options dialog box, tick the "Developer" box located on the "Customize the Ribbon" panel. (fig. 2) Click on "OK" once selected. You should now be able to see the "Developer" tab in the Ribbon. (fig. 2.2)
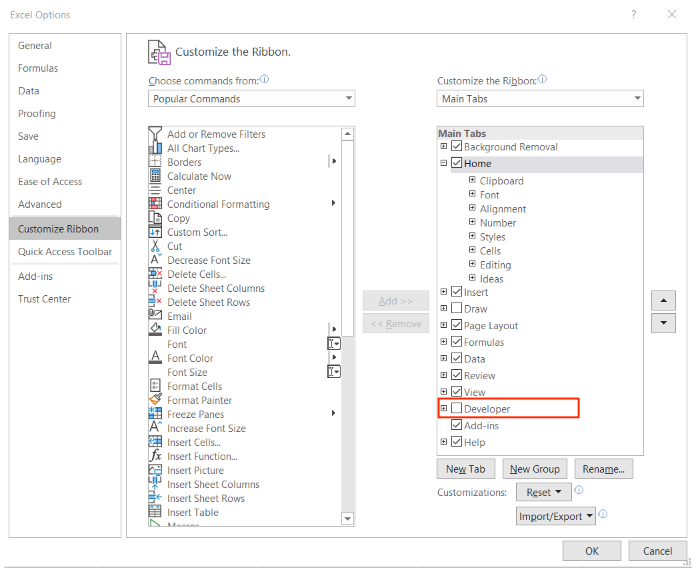
Fig: 1.2

Fig: 1.2.1
STEP 2 - INSTALLING THE MACRO
1. Navigate to the Developer tab in the Ribbon and click on the "Excel Add-Ins" button.

Fig: 2.1
2. In the Add-ins dialog box, click on "Browse" and locate the Macro from the file browser.
Tip: Save the Macro in a newly created folder and place it in the Documents folder to avoid accidental deletion.
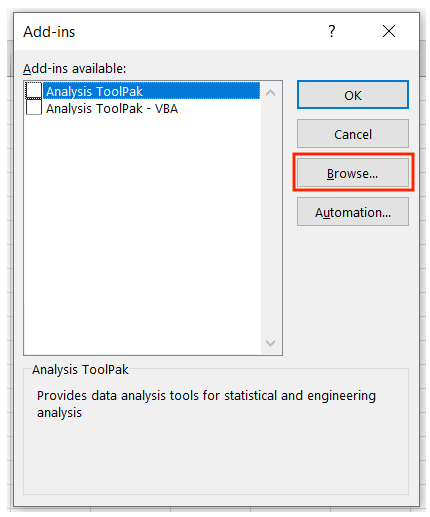
Fig: 2.2.1
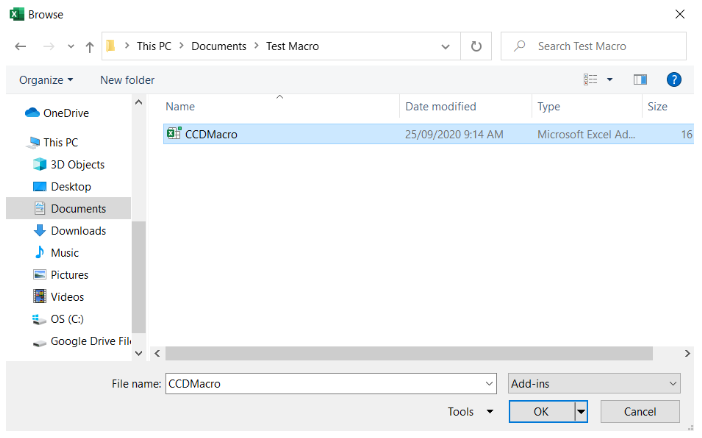
Fig: 2.2.2
3. Ensure the installed Macro is selected and click "OK".
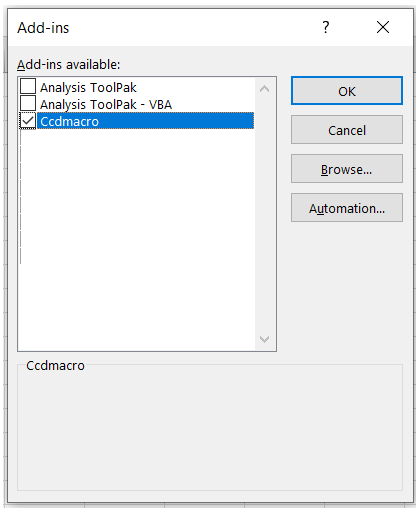
Fig: 2.3
4. Navigate back to the Home tab on the Ribbon, Right-click on an empty space in the Ribbon and select "Customize the Ribbon".

Fig: 2.4
5. On the "Customize the Ribbon" panel (located on the right of the Excel Options dialog box);
- Select "Home"
- Click on "New Group"
- Select the created Group
- Click on "Rename" and rename the Group to "Macro" for easy identification. (Fig: 2.5.2). Click "OK" once renamed.
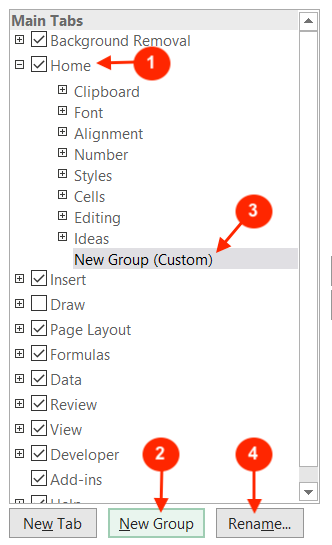
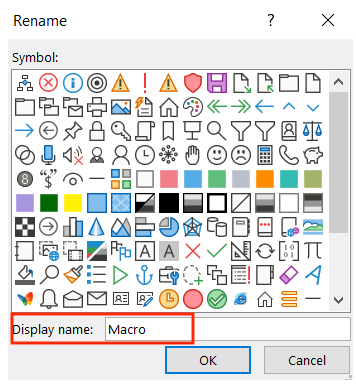
Fig: 2.5.1 Fig: 2.5.2
6. Whilst ensuring that the newly created Macro group is selected, click on the drop-down list from the left panel named "Choose commands from" and select "Macro" from the list.
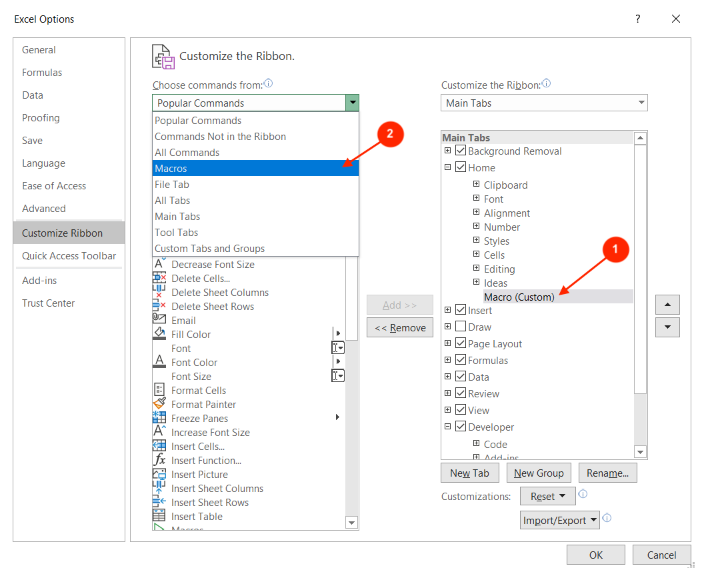
Fig: 2.6
7. Select the installed Macro and click on "Add" to add it to the newly created Macro Group. Once added, click on "OK". And you're done! The Macro will now display on your Home Ribbon for use. (Fig: 2.7.2)
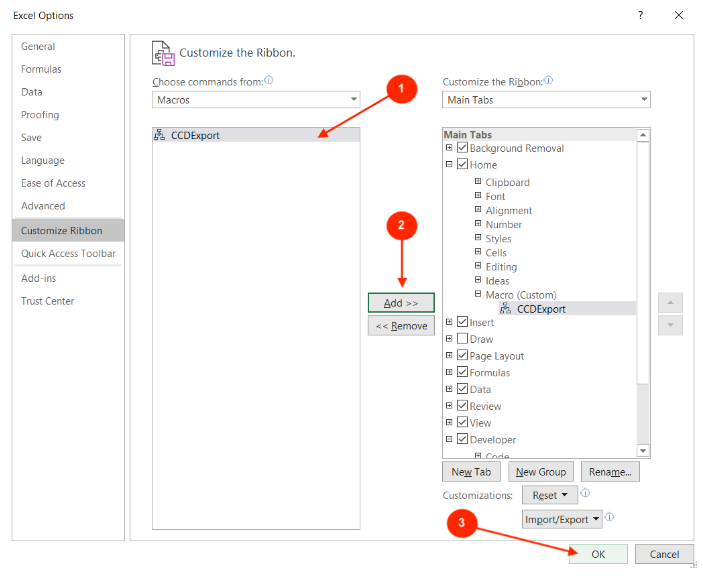
Fig: 2.7.1

Fig: 2.7.2