STEP 1 - ENABLE THE DEVELOPER TAB IN EXCEL
If you do not see the Developer Tab in the Toolbar Ribbon, you will need to enable it first.
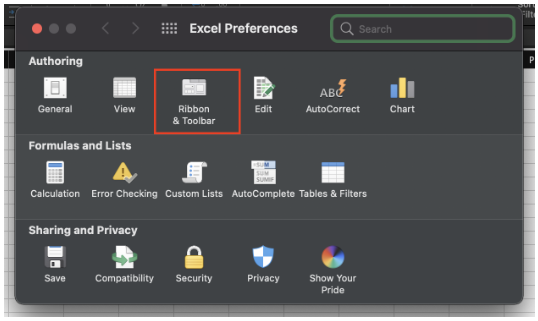
1. Open an empty Excel workbook. Select "Excel" in the very top left hand-side of your screen and then select "Preferences"

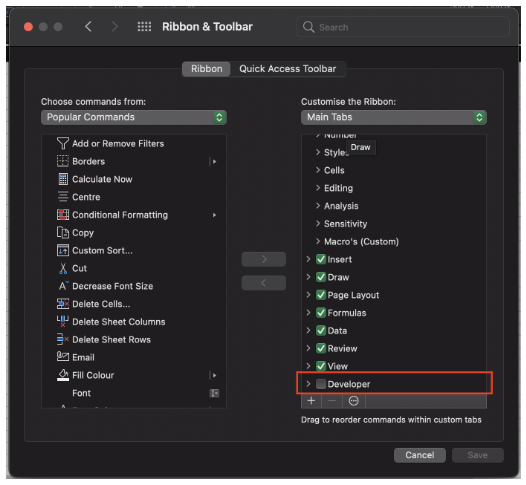
2. Select "Ribbon and Toolbar", now on the right hand-side selection, scroll down and enable "Developer" mode.
STEP 2 - INSTALLING THE MACRO
If you do not see the Developer Tab in the Toolbar Ribbon, you will need to enable it first.
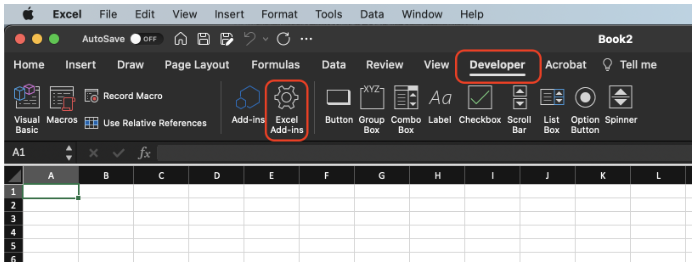
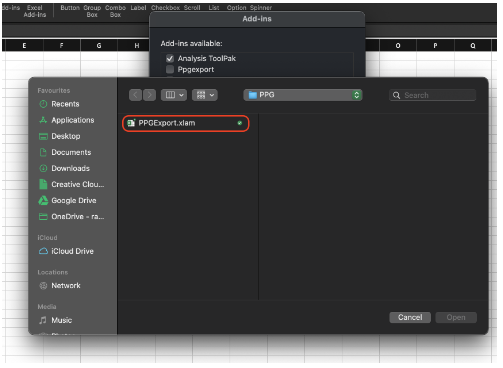
1. Select "Developer" in the ribbon tab, then "Excel Add-ins". This is where you will add the macro.
2. Select "Browse".
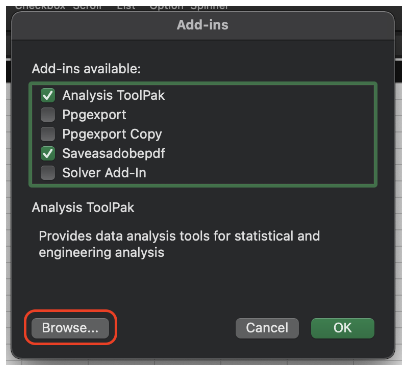
3. Select the macro you want to install.
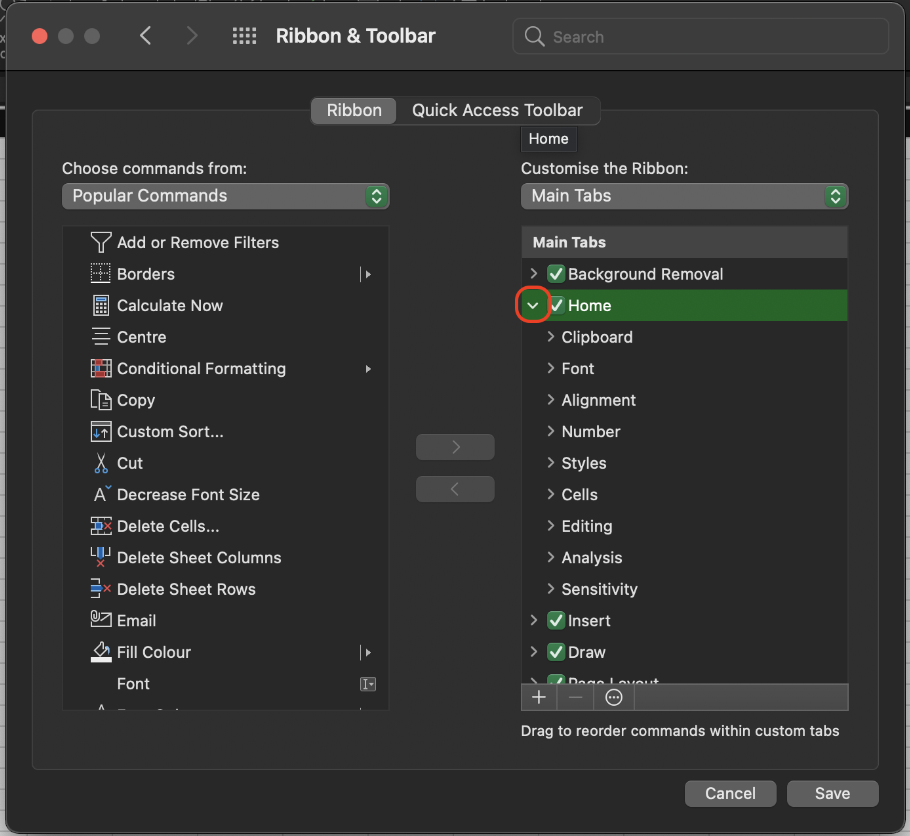
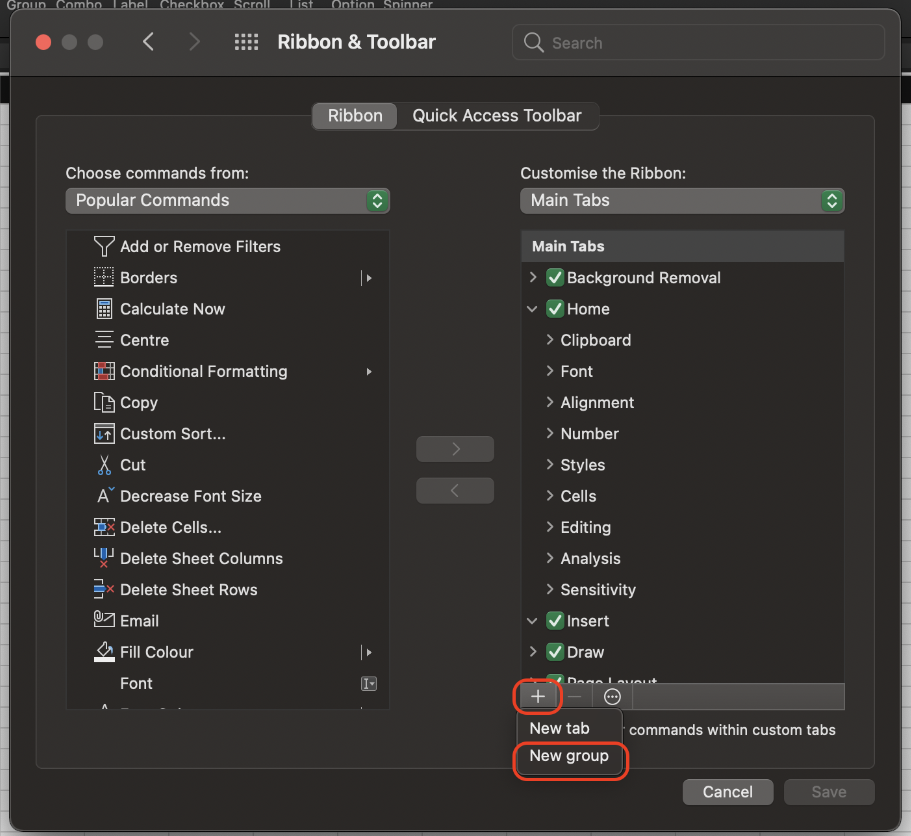
4. Navigate back to the preferences window, and select "Ribbon and Toolbar" once again. Select the "+" symbol located at the bottom and select "New Group".
 |
 |
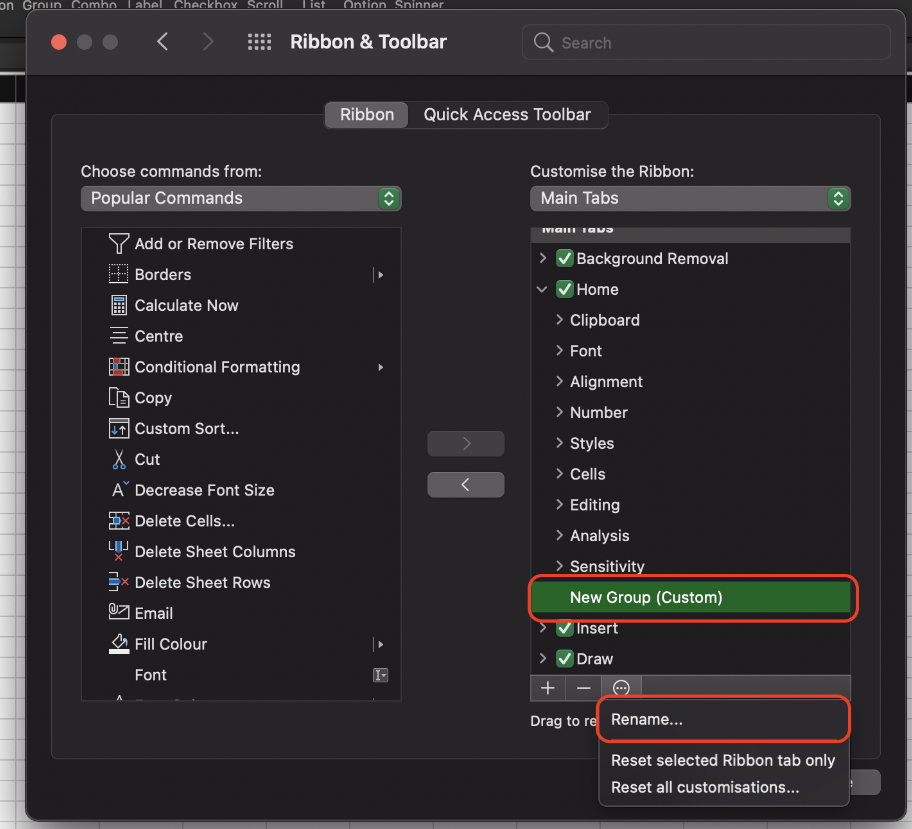
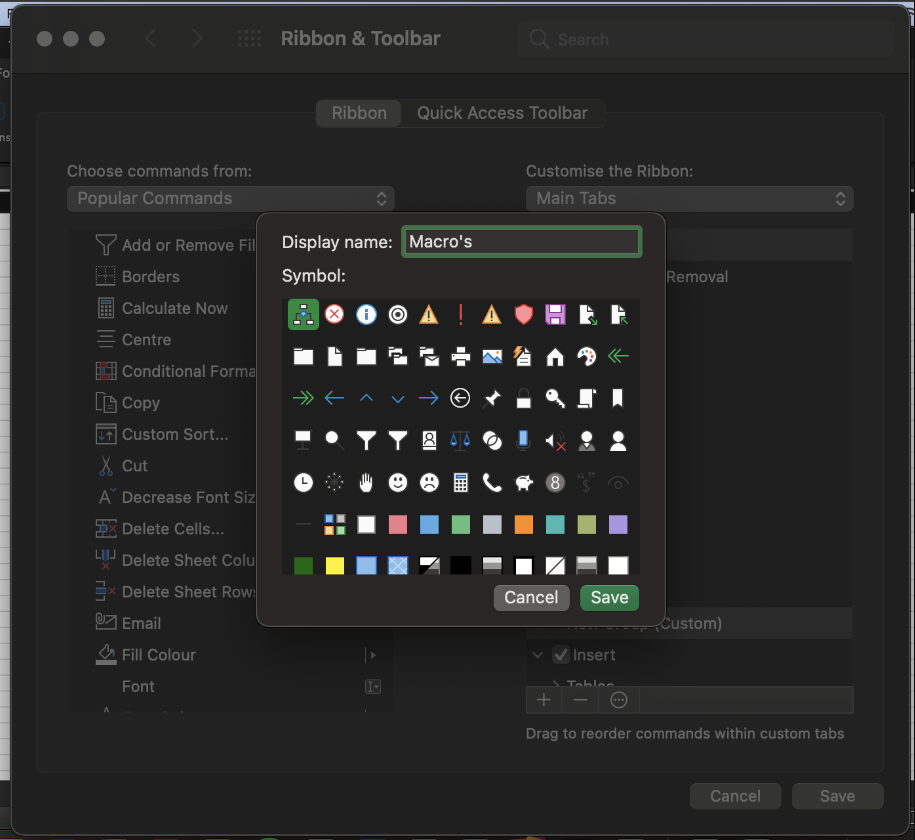
5. Once that new group has been created, rename it to something identifiable.
 |
 |
6. Whilst ensuring that the newly created Macro group is selected, click on the drop-down list from the left panel named "Popular Commands" and select "Macros" from the list.
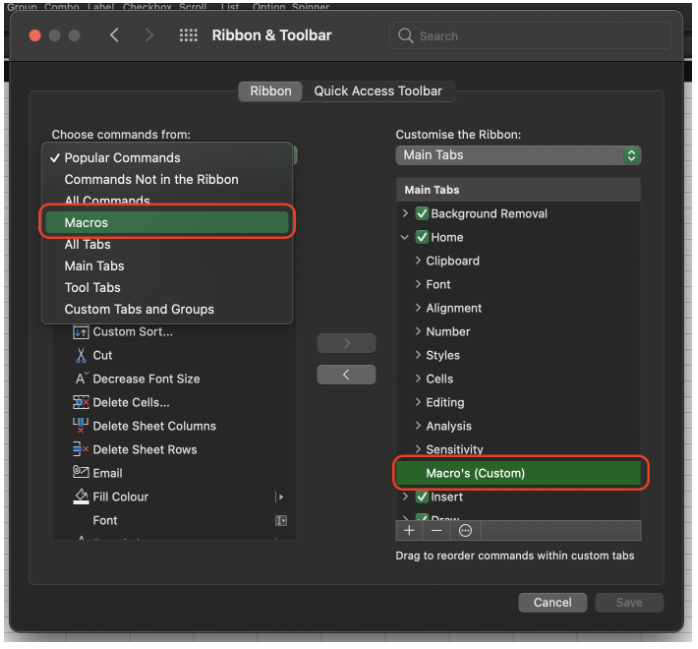
7. Select the installed Macro and click on "Add" to add it to the newly created Macro Group. Once added, click on "OK". And you're done! The Macro will now display on your Home Ribbon for use. (Fig: 2.7.2)
 |
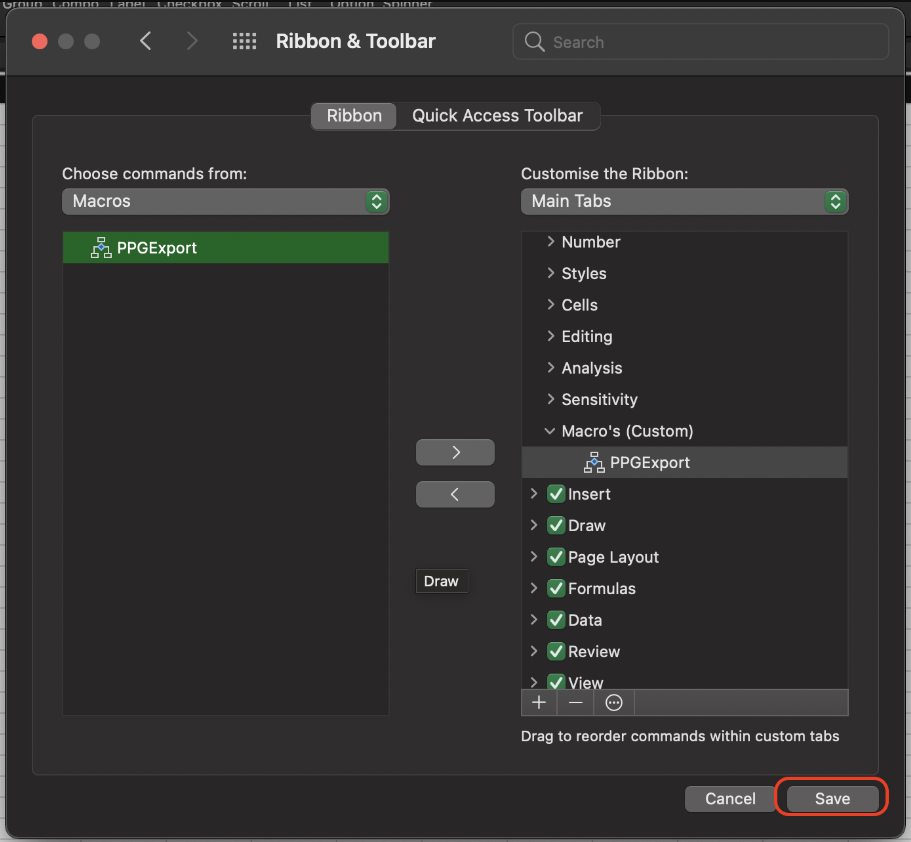 |
The macro will now be conveniently located in the "Home" ribbon.
If you need assistance installing a macro or would like to learn more about how Radaro can be integrated into your operations, contact your Radaro Account Manager or a member of the Radaro team via support@radaro.com.