Overview
What is an Application Programming Interface (API)?
An API enables two-way communication between software applications driven by requests. APIs are request-based, meaning that they operate when requests come from 3rd party systems/applications.
Radaro is an API-first platform and API integration is best practice among our clients. API integration allows seamless and automated data transfer between your existing systems into Radaro as well as updates based on activity that occurs within Radaro's platform (Ex. when a driver marks each job as completed in their Radaro mobile app, our API sends a webhook event with the most up-to-date data related to the job including status updates, proof of delivery photos / signatures, geofencing data, timestamps and more).
Radaro's API enables businesses to leverage real-time insights from the field, retrieve data on an ad-hoc basis and connect data pipelines via webhook event with third party systems (Transportation Management, Order Management, Enterprise Resource Planning and more).
Radaro API documentation is available here. All API data is transmitted in JSON format.
The most common uses of Radaro's API are:
- Add jobs (POST method - used to send data to the API server to create or update a resource)
- Retrieve job data (GET method - used to retrieve data from a server at the specified resource)
- Remove jobs (DELETE method - delete the resource at the specified URL)
- Update jobs (PATCH method - apply partial modifications to the resource)
Creating a Job with the API
To begin integration, we recommend reviewing the data required to add jobs to your portal via API.
To add jobs to Radaro, you will need the following:
- Application for data transmission via API
- A great free resource for testing purposes is Postman
- Your Radaro server number
- Example below with server number as shown on your Radaro portal in Settings → General

- Example below with server number as shown on your Radaro portal in Settings → General
- Your API Key
- Example below with API Key as shown on your Radaro portal in Settings → General (click on the pencil icon to view your API Key)

- *Please note the API key must have the enabled setting toggled "on" for successful data flow
- Example below with API Key as shown on your Radaro portal in Settings → General (click on the pencil icon to view your API Key)
- Required job attributes per job: external_id*, customer, deliver_address
- *external_id must be a unique value for every job
- We recommend including as many attributes per jobs as possible for a richer dataset to analyze across your business
- More details on optional job attributes here
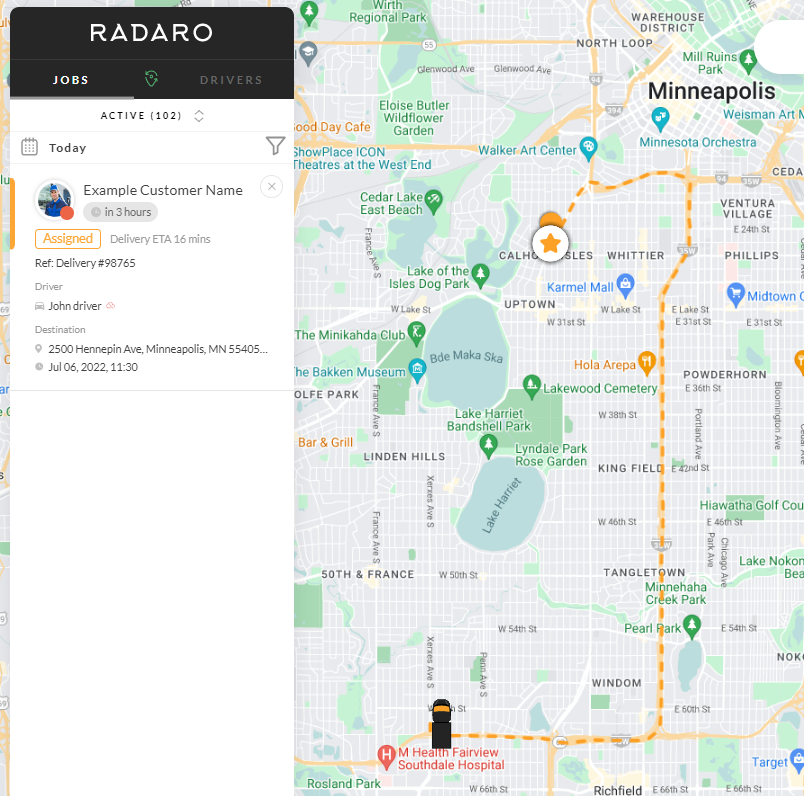
After gathering these details for a job, sending these details to Radaro will create a job in your portal. In the example below, the driver has already assigned via including the driver ID as well as other optional attributes such as "title" and "comment".


After a job is successfully created, the jobs appears in your Radaro portal.
You will also see a 201 response, indicating there were no errors and the transmission was successful.

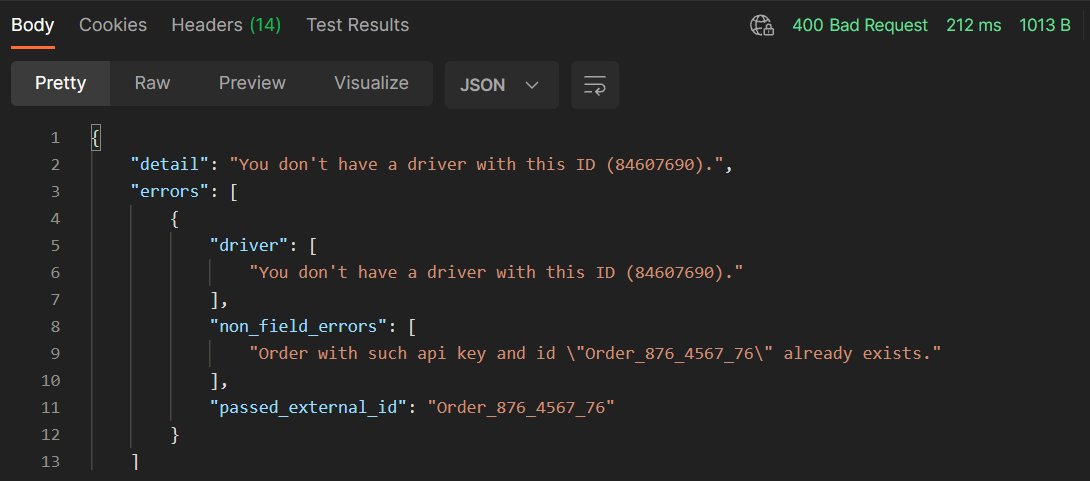
In some cases you may see an error to let you know that your API Key was not entered correctly or is not enabled.

A couple of other error examples:
- Cannot assign a driver to a job if there does not exist a driver with the ID you specified in your Radaro portal
- Cannot create a job with an external_id that is already assigned to an existing job. All external_id values must be unique
Webhook Events
What is a webhook?
Webhooks allow an application to share information with other applications in real-time. Webhooks are event-based, meaning that they will run when a specific event occurs in the source application.
Radaro sends real-time updates via webhook events based on activity in the platform. These updates provide the most up-to-date job details for every job and are sent immediately when the triggering events occur.
All webhook data is transmitted in JSON format.
Below are a few examples of when you can expect to receive webhook events from Radaro:
- When a job is created
- When a driver starts/completes/fails a job
- When a route optimization is created
- When a job is deleted
- When a customer provides feedback
- When a barcode is scanned by a driver
Webhook events can be sent to multiple URLs at the same time. This is best practice for complex implementations that require multiple groups / third party systems to be updated simultaneously.
Radaro Webhook Event documentation is available here.
To use Radaro webhooks, you will need the following:
- An endpoint where Radaro can send updates to
- You can provide a webhook URL where Radaro will send all events about status changes of your jobs. Webhook URL can be specified in your portal: Settings → General.
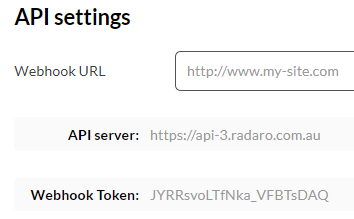
- You can provide a webhook URL where Radaro will send all events about status changes of your jobs. Webhook URL can be specified in your portal: Settings → General.
- Your webhook token, as shown in the image above, is used to identify which portal or group of Radaro portals the data is coming from. The first field at the top of webhook events references the 'token'
- A system for managing the data you will receive
- Pipedream is a great resource to help you get started if you don't have one already
- A plan to analyze the data and gather insights into your business in real-time
- Reach out to your account manager for suggestions based on your business needs!
Once you're receive your first webhook, create a job in Radaro either via API or manually (please note that webhook events are always sent for every job regardless of how the job was added to Radaro).
Below is data from an example webhook event sent when a job is created.
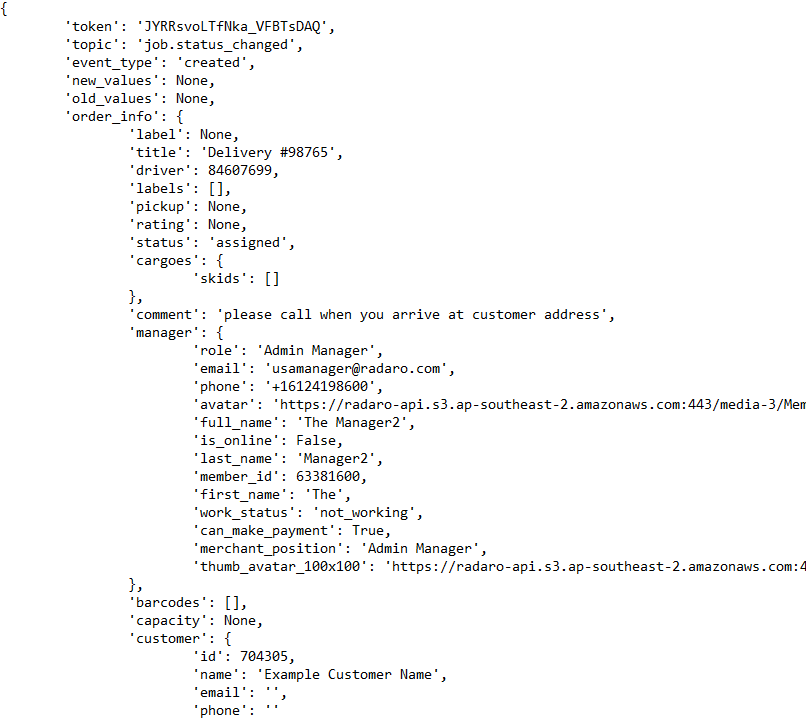
Here's a summary of the important data within this webhook event and a brief explanation of each:
- 'token' - references the webhook token, as shown in your Radaro portal within Settings → General
- 'topic' - references what has happened that caused a webhook event to be sent (example topics include: job.status_changed, optimisation.completed, job.uploaded_confirmation_document and job.completion_codes_accepted)
- 'event_type' - references whether the job was created or updated. For example, a webhook event with topic job.status_changed may have an event type of created or updated
- 'new_values' - references what has changed based on the topic of the webhook event. When a job is first created this will have a value of [None]. In the example below, sent when a driver marks a delivery complete, the 'new_values' shows 'status': 'delivered'.

- 'old_values' - references the previous value based on the topic of the webhook event. When a job is first created this will have a value of [None]. In the example above, sent when a driver marks a delivery complete, the 'old_values' shows 'status': 'in_progress' because the jobs status prior to being completed was in_progress
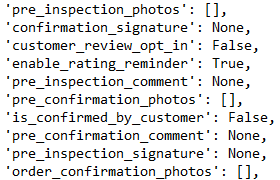
- 'order_info' - references all job data for a given job. As a job moves between statuses, these fields will update. For example a job will not contain details related to proof of completion until the driver has completed these steps in the Radaro mobile app. It is best practice to update each value when a new webhook event is received as multiple fields may change in a single webhook event update:
If you need assistance with your Radaro integration or are interested in learning more about how Radaro can be integrated into your operations, contact your Radaro Account Manager or a member of the Radaro team via support@radaro.com.