Jobs can be created in Radaro using multiple methods; Manual job creation, Bulk CSV upload and via API integration.
This article covers creating jobs using a CSV sheet. We call this a Bulk Job Upload.
A Bulk Job Upload allows you to create multiple jobs in Radaro in a few clicks. This method is ideal when you have a planned run-sheet for a set day.
Step 1
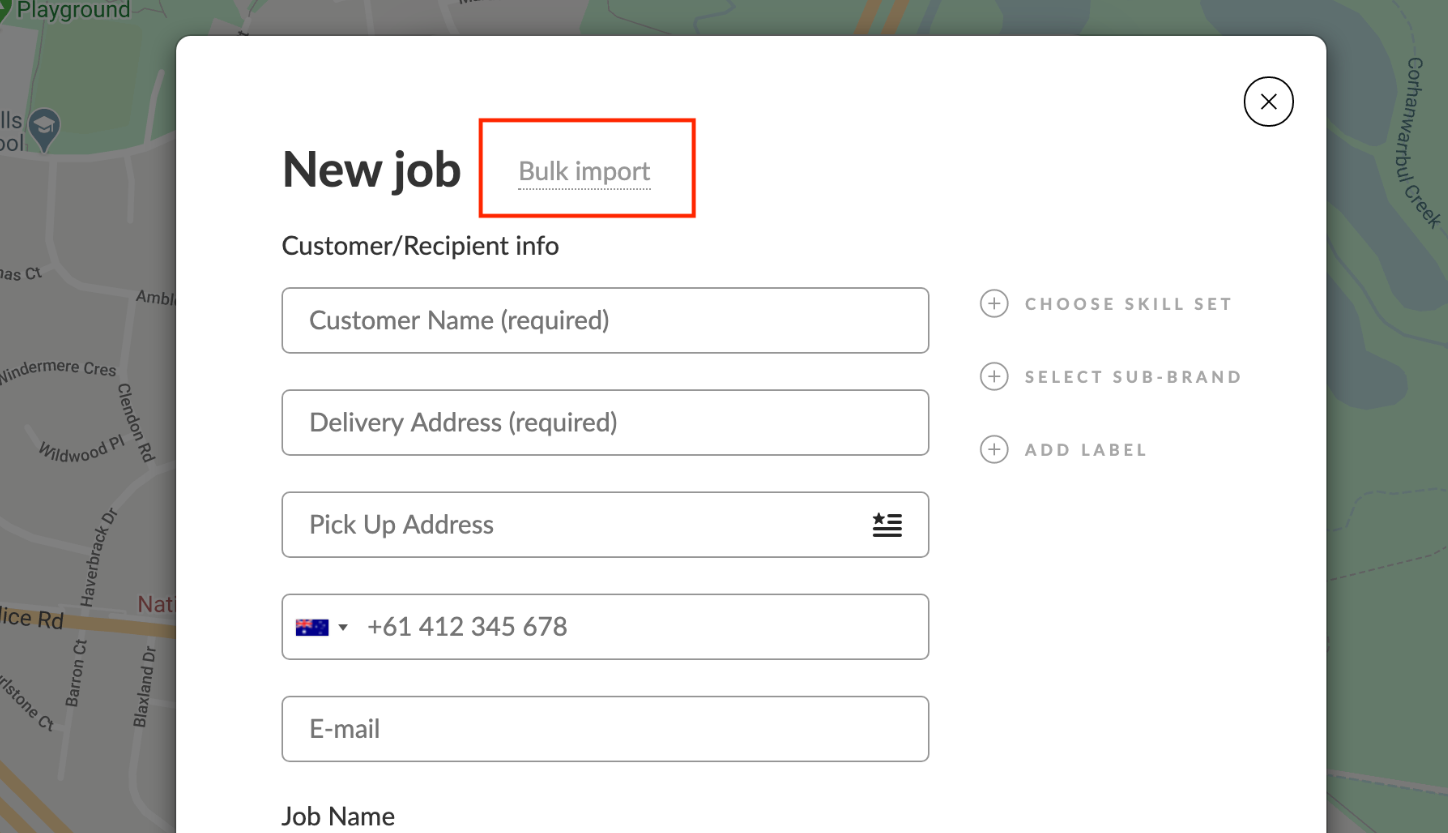
Log in to your Radaro dispatch portal and select "Add Job". Select "Bulk Import" in the job creation screen.
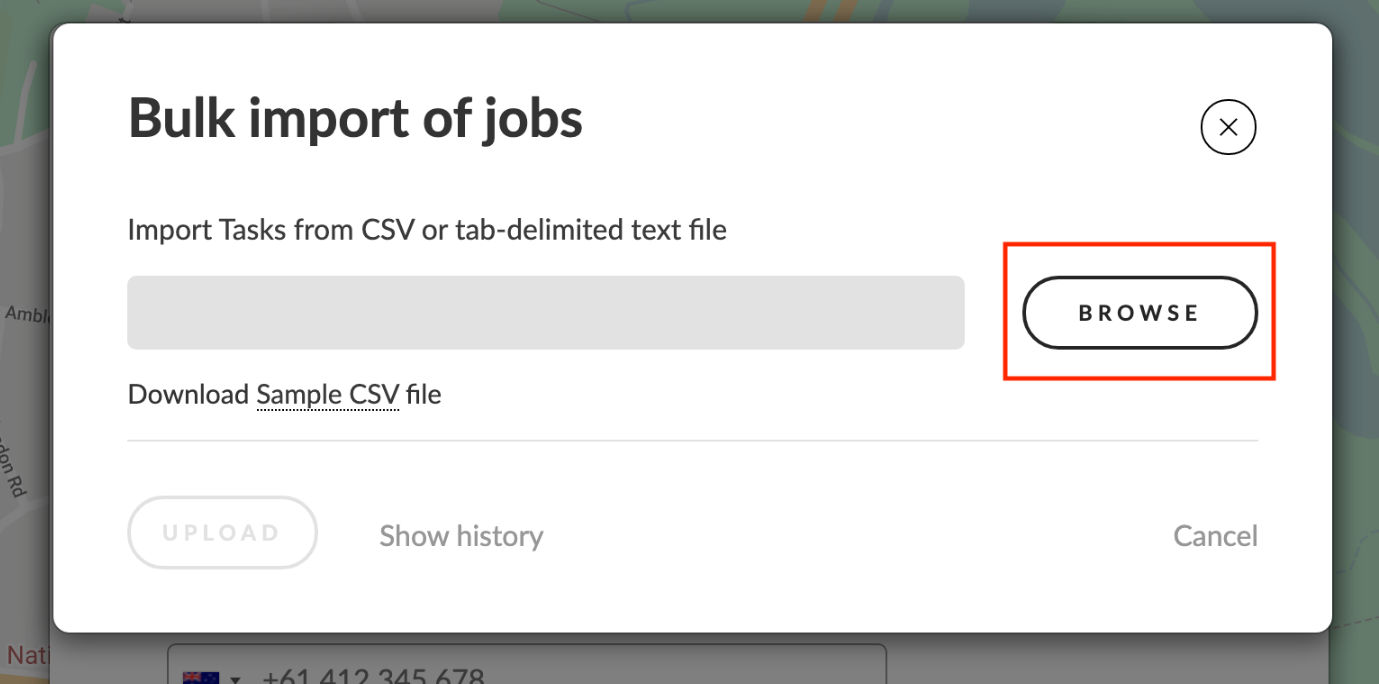
Step 2
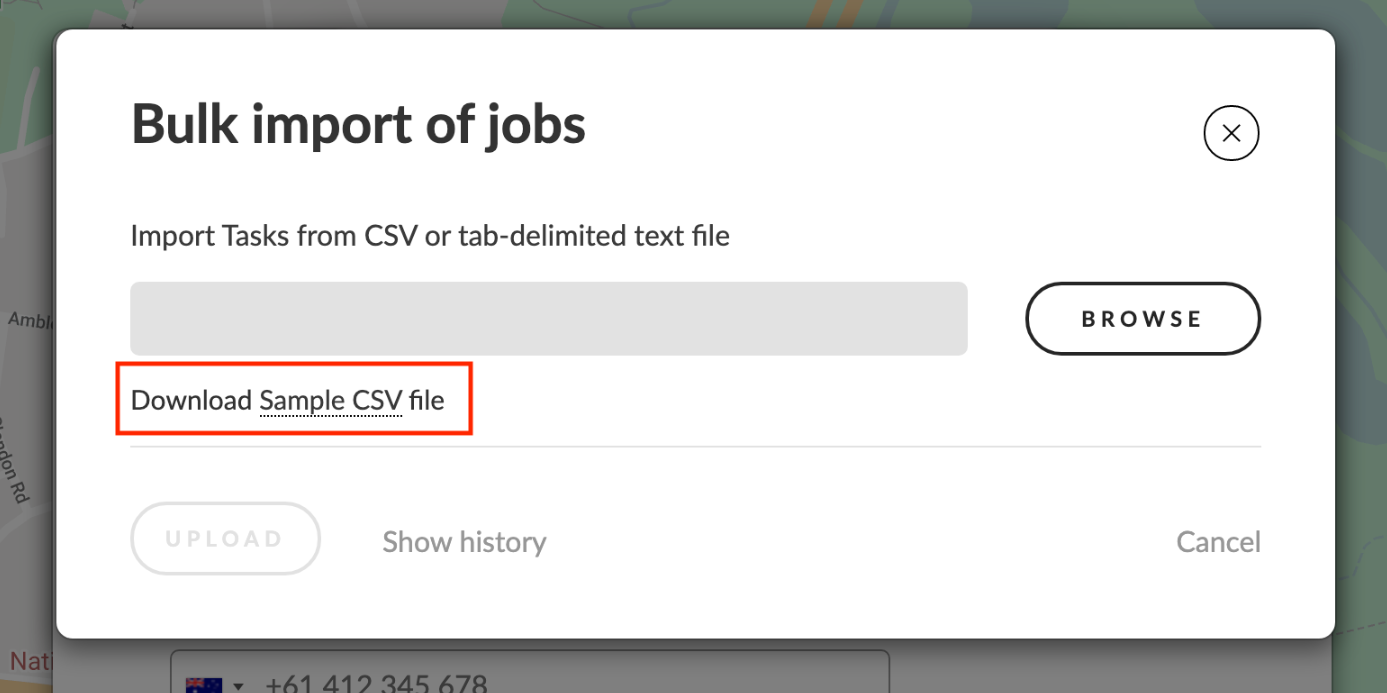
Selecting "Bulk Import" will open the CSV upload screen. Here you can download a sample CSV sheet (You can also download the sheet located at the end of this page).
Step 3
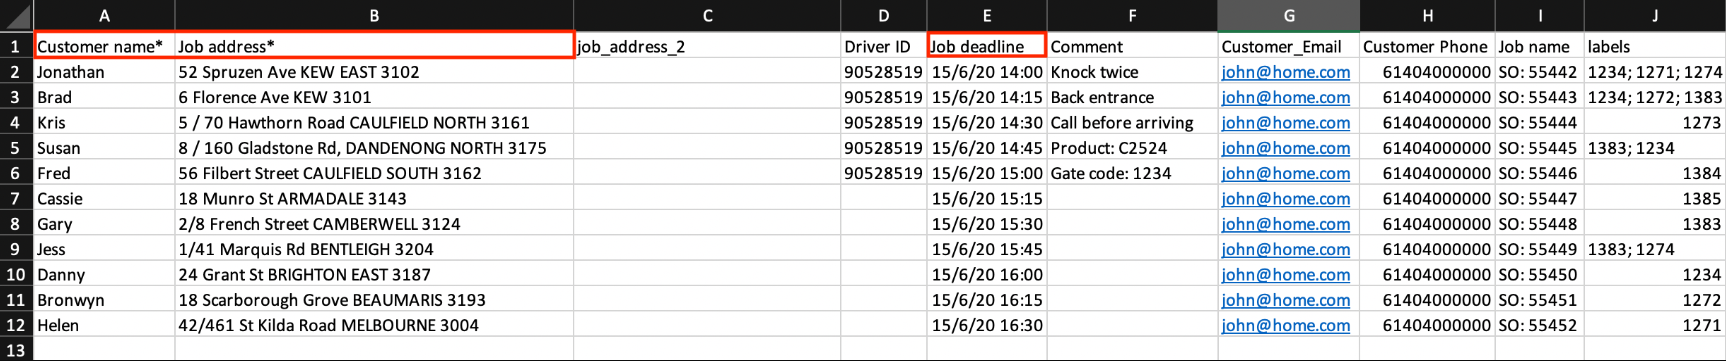
Once downloaded, you can begin entering the delivery information in the CSV sheet. You can enter as many or as little information on the sheet. Similar to a manual job creation process, the compulsory fields in a bulk upload sheet are Customer Name, Delivery Address and a job deadline.
Fields
Customer name*: The Customer's name.
Job address*: The delivery or final destination address for this job.
job_address_2: An additional data field. If the address contains a unit or apartment number, you can add it in this field.
Driver ID: The driver you would like this job assigned to, for execution. You may add the driver's unique driver ID in Radaro in this field. You can locate the driver ID under the "Drivers" tab in your dispatch portal. A guide on how to do so, here. Leaving the field blank will upload jobs in an "unassigned" status, ready for manual assignment.
Job deadline: The job deadline field allows you to create a job for a day in the future or the same day. Dates and times can be entered in the following format: 15/6/2020 2:00:00 pm.
Comment: Specific delivery instructions (if any) for the driver.
Customer email: Customer's email address. Ideal in events where a customer mobile is unavailable or not on record. Customers will receive delivery notifications via email (as configured), similar to SMS notifications.
Customer phone: Customer's mobile phone number in the following format: 61404123456 (highlighted is the country code)
Job name: A name to identify the job, unique to the business. i.e. Sales/Purchase Order Number, Invoice Number. Leaving this field blank will cause Radaro to automatically assign a unique name to this job. i.e. Job: ID 122991911
Labels: If job labels are applicable to your business, you can add the unique ID/s of the Label/s in this field. Multiple job labels can be separated by a semicolon ";". More information on how to create job labels and label IDs here.
Step 4
Once all details are entered, save and close the CSV sheet. On the dispatch portal, return to the "Bulk Import" screen, select "Browse" to locate your saved bulk-upload sheet, and select "Open".
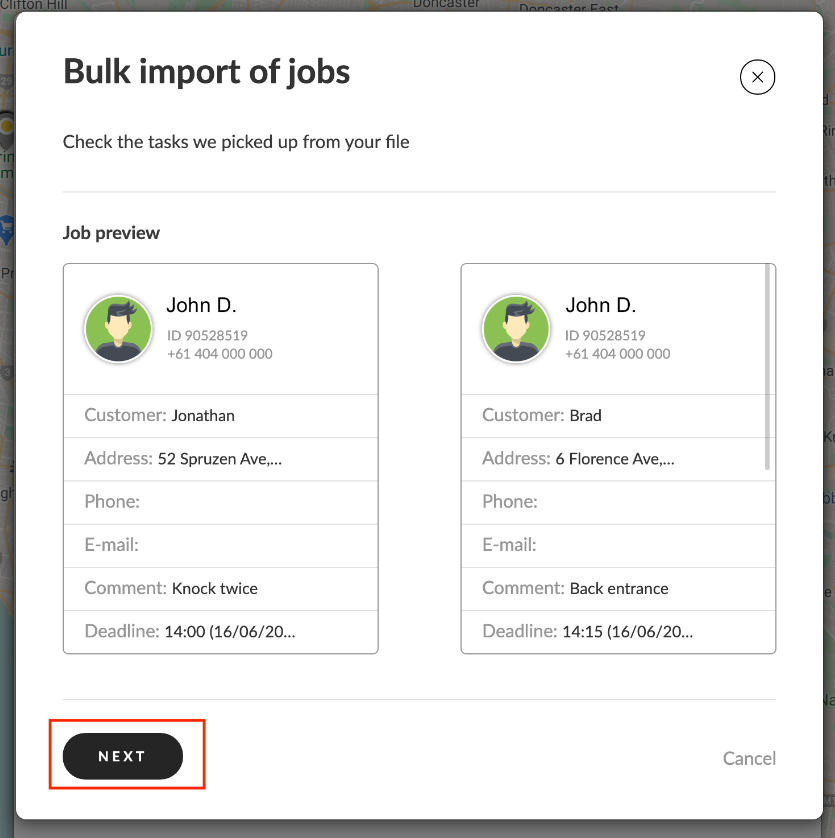
Step 5
Select on "Upload" to upload your sheet. This will generate a preview of the first 4 jobs for your review. Select "Next" to proceed with the upload.
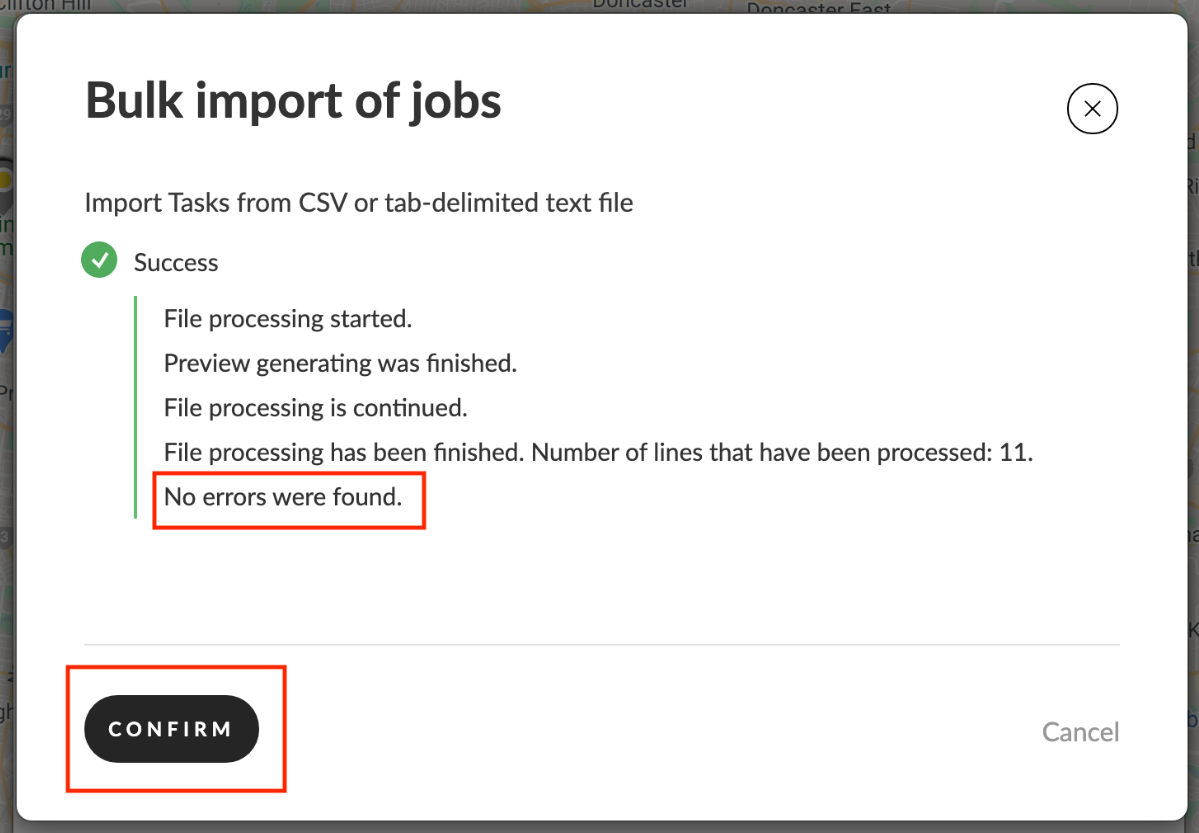
Step 6
Radaro will validate the CSV file for any error and present results. Selecting "Confirm" will create the jobs within Radaro. You're all done!