Routing allows you to optimize the job runs of both individual and groups of drivers from a chosen start and finish location, in order to provide drivers with their least kilometer run for their set of jobs in the shortest efficient route using live and future predicted traffic.
Advanced Route Optimization allows for unallocated jobs to be spread across a number of drivers in order to reduce kilometers spent on the road based on set logic.
Step 1
Start by uploading jobs into Radaro in an "unassigned" state. Multiple ways on how to upload jobs can be found here.
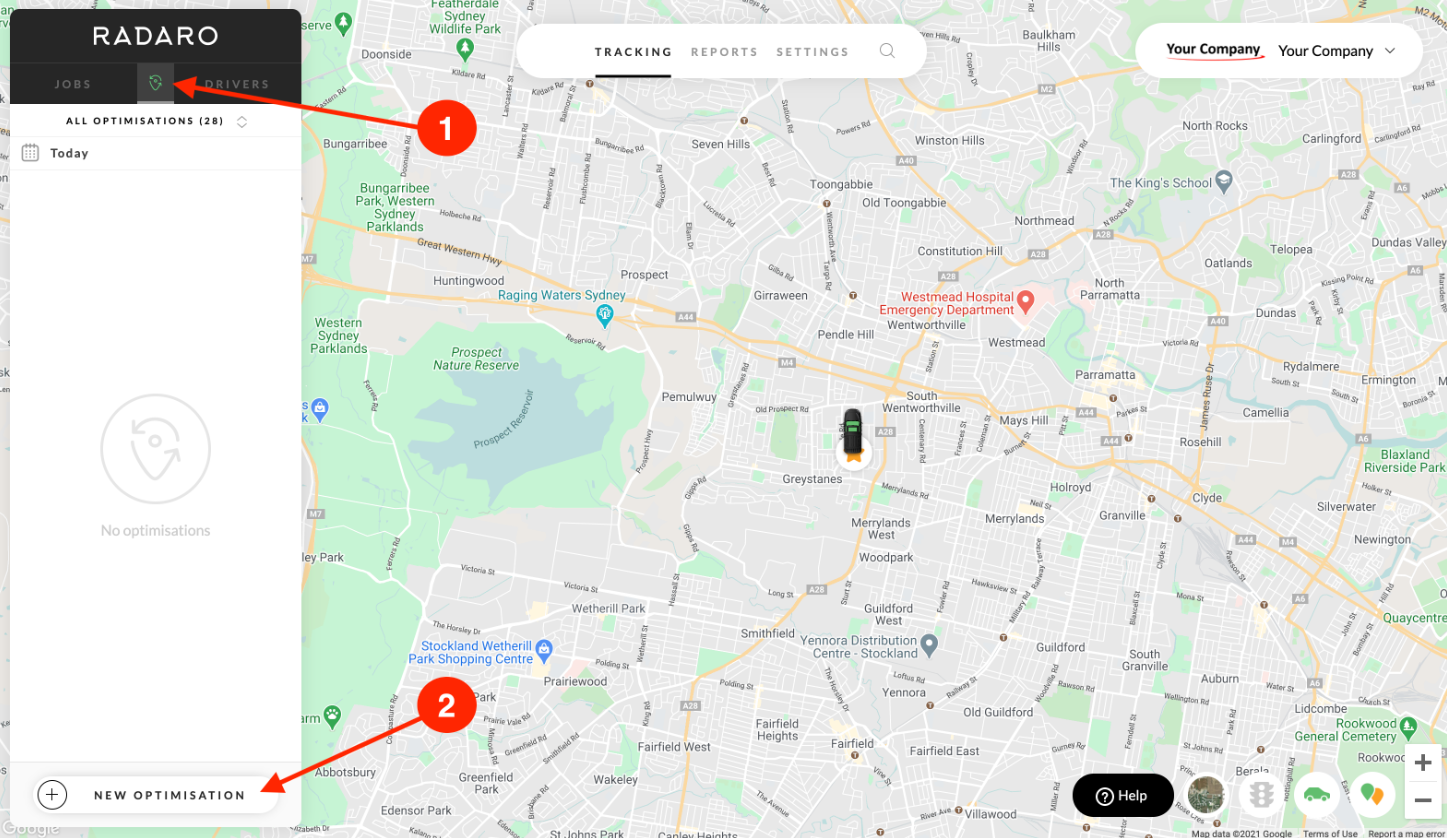
Once uploaded, click on the Optimizer Button (1) to open the Optimization screen. This screen displays all optimizations past, present and future. Click on "New Optimization" (2) to start a new optimization.
Step 2
In the optimization screen, start by selecting the date for your optimization (1).
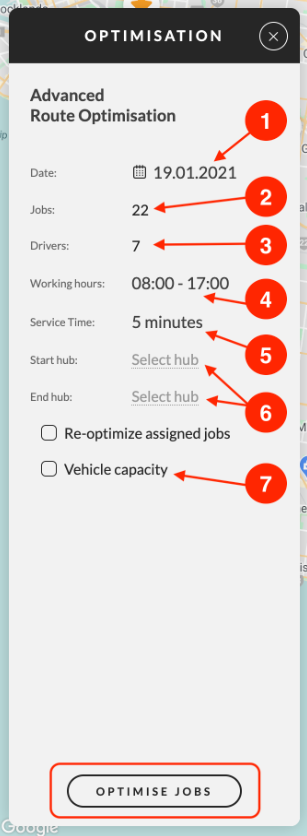
- Date - Select date of optimization
- Jobs - You can choose to optimize select jobs by deselecting or filtering. All jobs are selected by default.
- Drivers - Select the number of drivers you are optimizing for the run.
- Working Hours - Select the desired delivery/service window. For the best results, "tightening" this window will allow an efficient optimization. Note: Beware to not over-tighten the windows. This could result in the optimizing engine excluding work orders that cannot be executed in the given time frame.
- Service Time - Select the determined on-site dwell time for each work order.
- Start/End Hub - Select a start and end location for the route. You can also select a "Driver Default Hub" for instances when a driver starts or finishes their day at a dedicated stop location (i.e. home).
- Vehicle Capacity - Check this box if you use the vehicle capacity function in Radaro. Capacity allows you to optimize runs based on the capacity of the driver's vehicle, effectively preventing overloading goods in the vehicle.
Once you've set the desired optimization logic, click on "Optimize Jobs" to create the optimization.
Step 3
Optimization will take a few seconds to minutes, depending on the number of jobs and drivers. The optimization progress will be displayed in the window until complete.
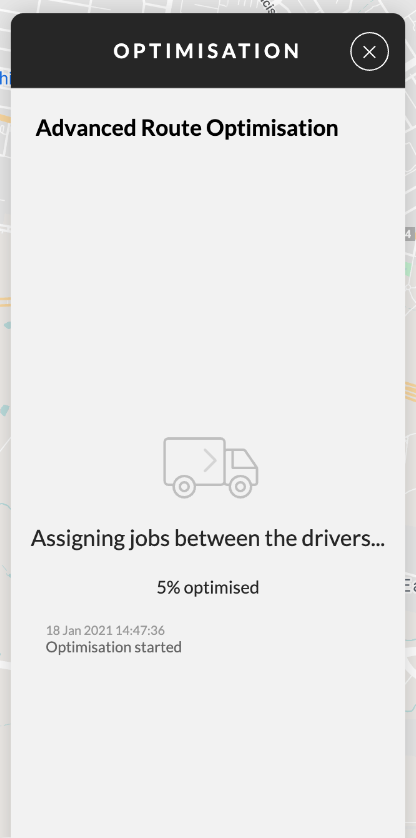
Once complete, you will be presented with the optimization results for review.
Step 4
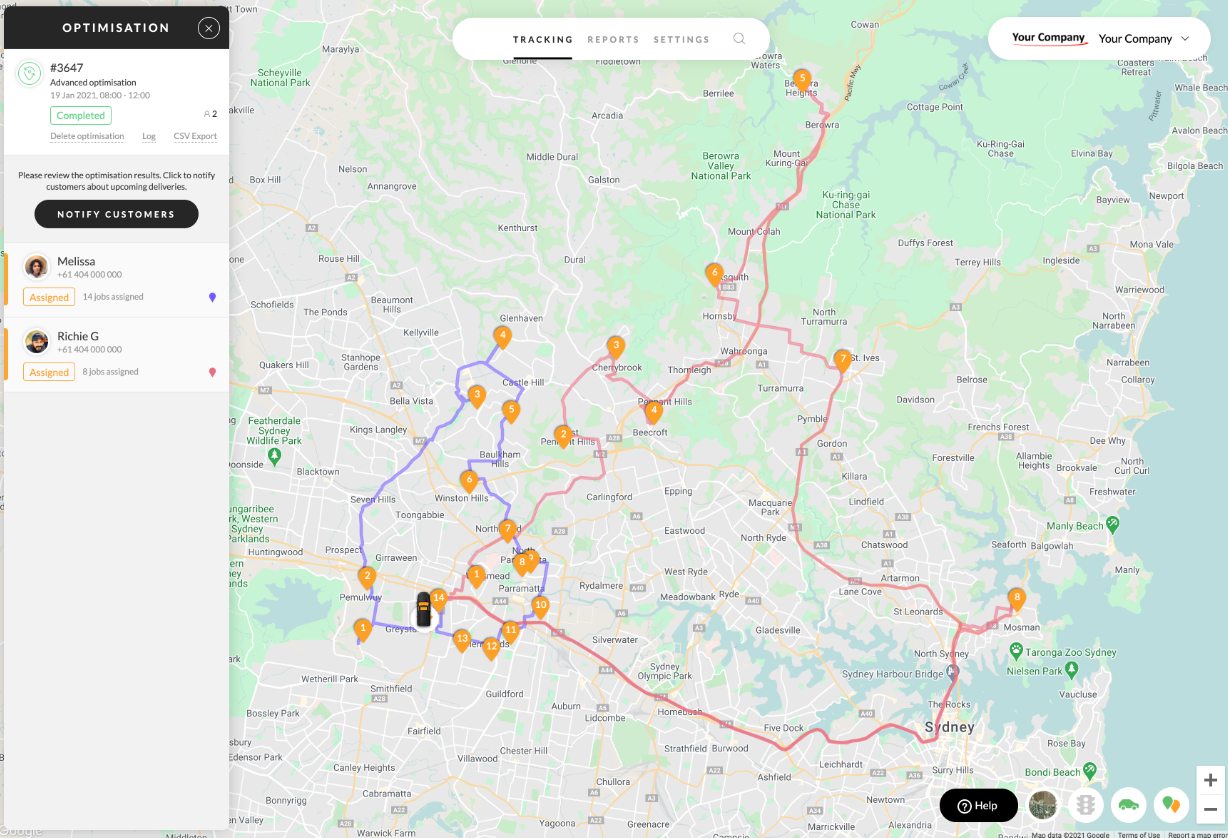
You will be able to click on each driver's icon to review their route and suggested time windows. You can also delete the optimization should you decide to make any changes (Fig2).
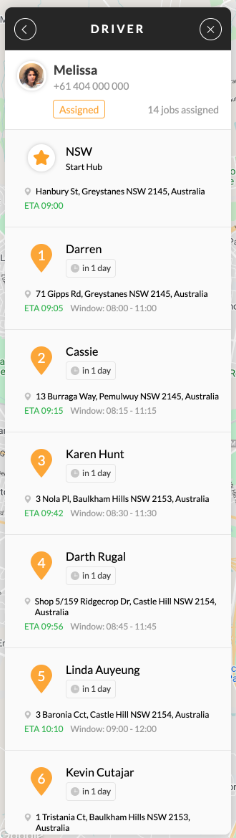
Fig1

Fig2
Step 5
If you are satisfied with the optimization results, you may choose to send upcoming delivery/service notifications to customers, based on the optimization. Click on the "Notify Customers" button to trigger notifications.

And you're done! The route will now be pushed through to each drivers’ device so they can begin executing work orders.
Note: Drivers will not be able to view the optimized route on the driver app until the day of execution.