Why Adaptive Routing?
Adaptive Routing was built around the operational scenarios dispatchers manage every day:
-
A driver calls in sick.
-
A vehicle reaches pallet capacity before delivery capacity.
-
A high-priority delivery arrives after optimisation has completed.
-
A route needs balancing across multiple drivers.
Instead of rebuilding routes from scratch, planners can make targeted adjustments while maintaining full visibility of operational impact.
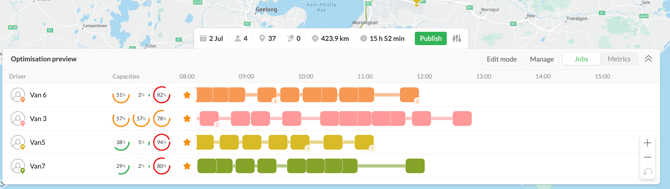
Viewing Adaptive Routes
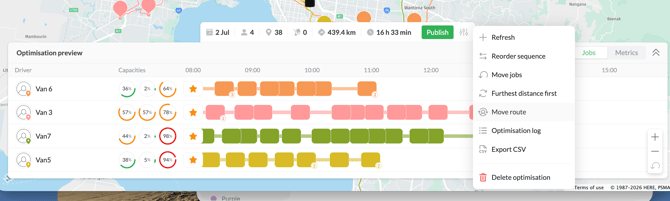
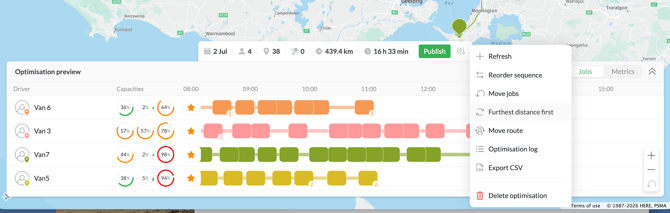
When Adaptive Routing is active, routed jobs are displayed in a Gantt-style view, enabling you to review and modify routes before publishing the final schedule.
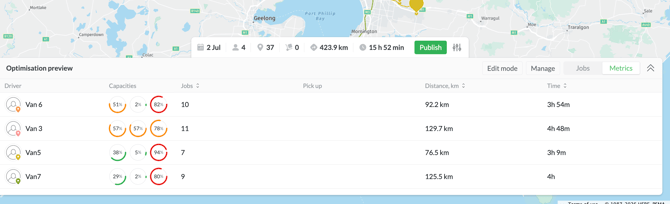
By default, jobs are shown in the Jobs (or timeline) view. Switch to the Metrics View to see detailed route information, including job volumes, timing and distance of each proposed route.
What changes can I make?
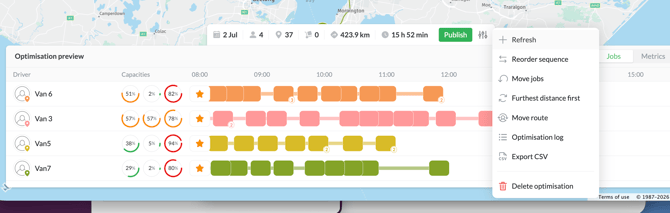
When using Adaptive Routing, prior to the route being published (and pushed to Drivers), via the Edit or Manage Jobs buttons, you can:
- Add more jobs
- Reorder (re-sequence) jobs
- Move Jobs between drivers
- Move a full route to a different driver
- Utilise Furthest Distance first
- Change the Optimisation Focus
Adding More Jobs
The Adaptive Route view makes it easy to identify if a Driver has additional capacity within their day to complete additional jobs, be it vehicle capacity or working hours.
Adding additional jobs can be actioned in four simple steps.
1. Select Manage then choose the Refresh option.
2. Select the driver route (from the left side) you’d like to add jobs to, then click Refresh route.
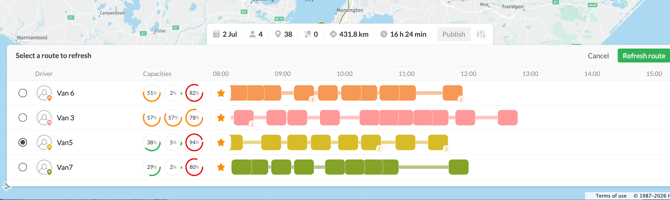
3. A list of available jobs will appear.
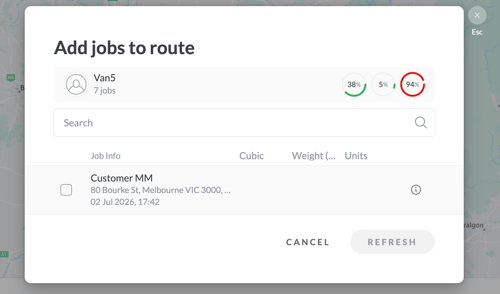
4. Click the job(s) you wish to add, followed by the Refresh button to confirm.

Reorder (re-sequence) jobs
This can be done in two ways, either via the Edit Mode or Manage buttons.
Once one of the options is chosen, simply drag the job tiles to the desired location.
If using Manage, you can re-order multiple jobs before selecting Confirm to lock in the changes.
Moving an entire route
If you need to move all jobs within a proposed route to a new Driver, this can be easily achieved in three simple steps.
1. Click Manage and choose Move route
2. Select the route you wish to move from the left side, then Move route.
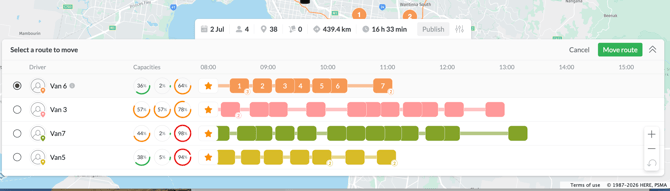
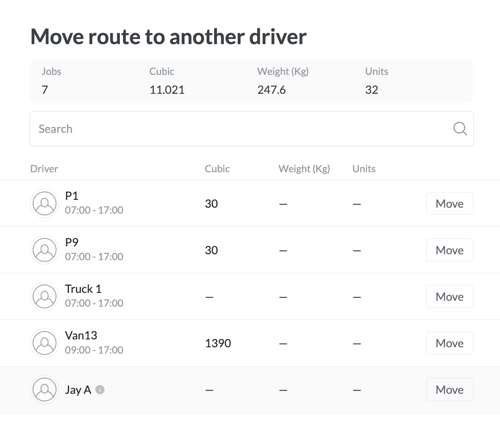
3. A list of available Drivers will be shown. Simply click "move" next to the Driver you wish to move the route to.
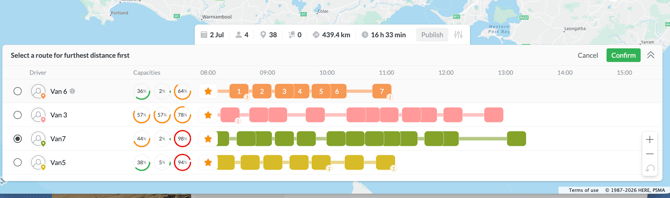
Furthest Distance First
In certain environments, it's preferred to start deliveries at the furthest point, and work back towards the base.
You can reverse the route sequence so the first jobs is at the furthest point, via the Manage button.
1. Simply click Manage then Furthest Distance First.
2. Select the desired route from the left side, then Confirm to apply the change.
If you need assistance or are interested in learning more about how Radaro can be integrated into your operations, contact your Radaro Customer Success Manager or a member of the Radaro team via support@radaro.com.